Excel VBA: Save a Worksheet as a New File (Quick View)
Sub Save_Worksheet_as_New_File()

Sheet_Name = "Sheet1"
New_File = "New_Sheet1"

Set File_Dialog = Application.FileDialog(msoFileDialogFolderPicker)
File_Dialog.AllowMultiSelect = False
File_Dialog.Title = "Select the Directory to Save the File"
If File_Dialog.Show <> -1 Then
    Exit Sub
End If

Full_Name = File_Dialog.SelectedItems(1) + "\" + New_File

Worksheets(Sheet_Name).SaveAs Filename:=Full_Name

End Sub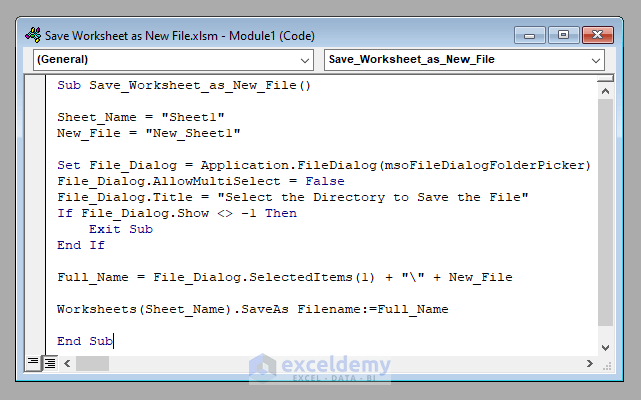
An Overview of the VBA Code to Save a Worksheet as a New File (Step-by-Step Analysis)
⧪ Step 1: Insert the Necessary Inputs
There are only two inputs required for this code. One is the name of the worksheet that we are going to save, and the other is the name of the new file in which we want the worksheet to be saved.
Let’s call our worksheet Sheet1 and save it under the name New_Sheet1.
So, the lines of the code will be:
Sheet_Name = "Sheet1"
New_File = "New_Sheet1"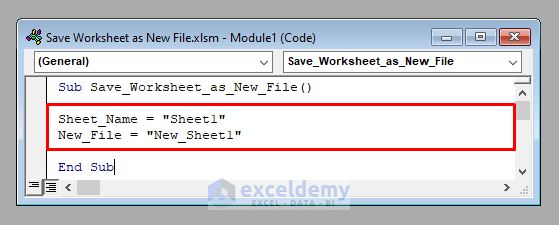
⧪ Step 2: Select the Directory
You need a FileDialog object to elect the directory where the new file will be saved on your computer.
Set File_Dialog = Application.FileDialog(msoFileDialogFolderPicker)
File_Dialog.AllowMultiSelect = False
File_Dialog.Title = "Select the Directory to Save the File"
If File_Dialog.Show <> -1 Then
    Exit Sub
End If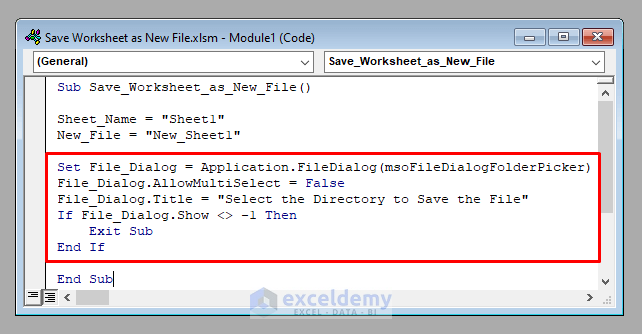
⧪ Step 3: Combine the Directory Name With the File Name
Full_Name = File_Dialog.SelectedItems(1) + "\" + New_File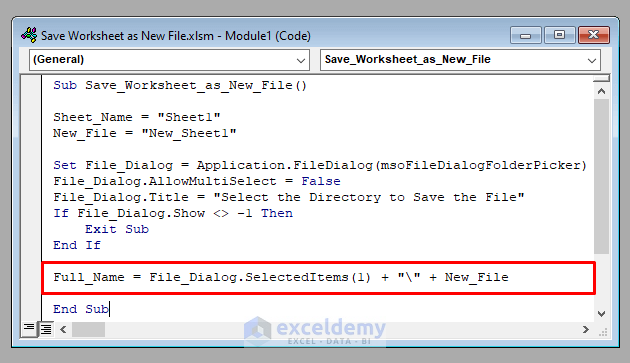
⧪ Step 4: Save the File
Save the worksheet as a new file with the given name in the selected folder, using the SaveAs method of VBA.
Worksheets(Sheet_Name).SaveAs Filename:=New_File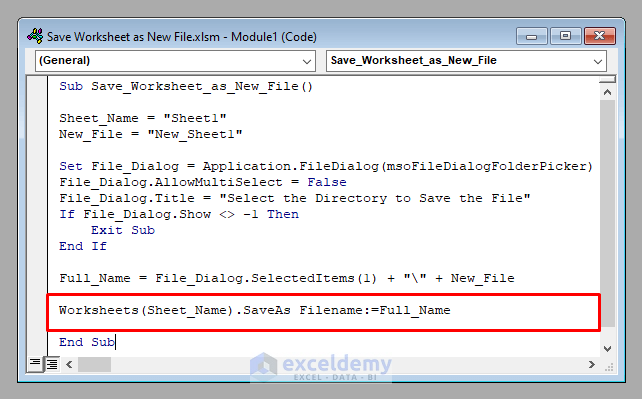
So, the complete VBA code will be:
⧭ VBA Code:
Sub Save_Worksheet_as_New_File()

Sheet_Name = "Sheet1"
New_File = "New_Sheet1"

Set File_Dialog = Application.FileDialog(msoFileDialogFolderPicker)
File_Dialog.AllowMultiSelect = False
File_Dialog.Title = "Select the Directory to Save the File"
If File_Dialog.Show <> -1 Then
    Exit Sub
End If

Full_Name = File_Dialog.SelectedItems(1) + "\" + New_File

Worksheets(Sheet_Name).SaveAs Filename:=Full_Name

End Sub
⧭ Output:
Run the code.
A FileDialog box will appear, asking you to select the directory in which you want the file to be saved. For this example, we’ll use the E:\ExcelDemy folder.
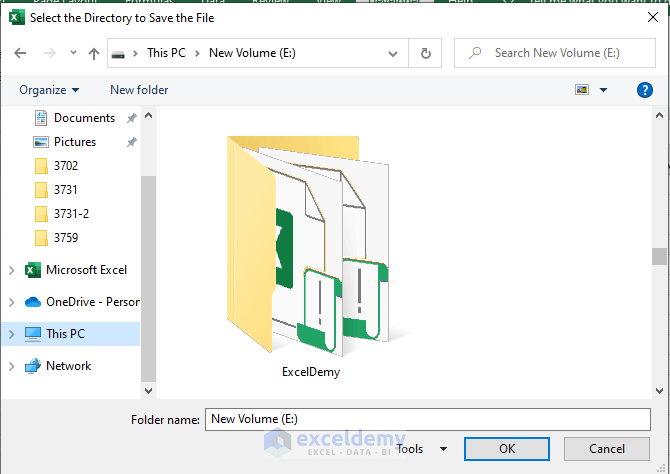
Press OK.
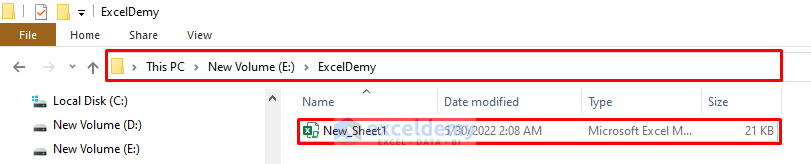
It’ll save the file with the new name.
Developing Macros to Save One or More Worksheets as One or More New Files Using Excel VBA
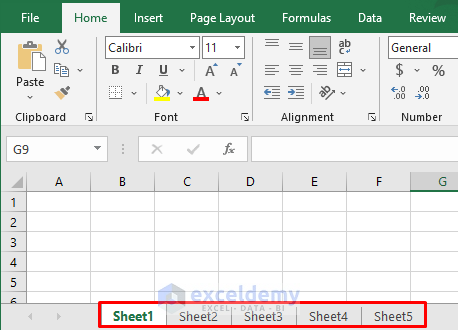
For this example, we’ll use a workbook with 5 worksheets, called Sheet1, Sheet2, Sheet3, Sheet4, and Sheet5, respectively.
We’ll develop Macros to save one or more worksheets from this workbook as new files.
1. Developing a Macro to Save Some Selected Worksheets as New Files
Let’s save the worksheets Sheet1, Sheet2, and Sheet3 with the names New_Sheet1, New_Sheet2, and New_Sheet3, respectively.
⧭ VBA Code:
Sub Save_Selected_Worksheets_as_New_Files()

Sheet_Names = Array("Sheet1", "Sheet2", "Sheet3")
File_Names = Array("New_Sheet1", "New_Sheet2", "New_Sheet3")

Set File_Dialog = Application.FileDialog(msoFileDialogFolderPicker)
File_Dialog.AllowMultiSelect = False
File_Dialog.Title = "Select the Directory to Save the File"
If File_Dialog.Show <> -1 Then
    Exit Sub
End If

For i = LBound(Sheet_Names) To UBound(Sheet_Names)
    Full_Name = File_Dialog.SelectedItems(1) + "\" + File_Names(i)
    Worksheets(Sheet_Names(i)).SaveAs Filename:=Full_Name
Next i

End Sub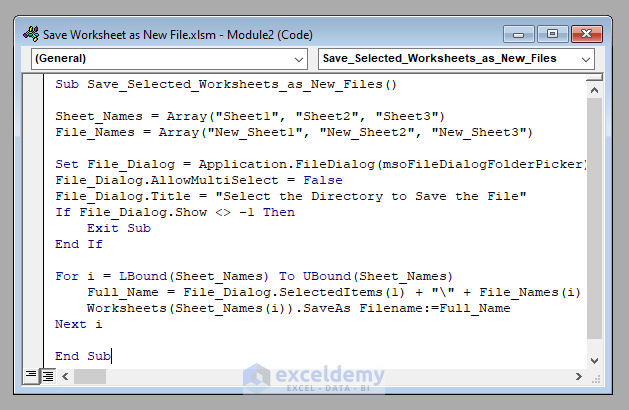
⧭ Output:
Run the code by changing the inputs.
A FileDialog box will appear, asking you to select the directory in which you want the files to be saved. The E:\ExcelDemy folder is once again used for the example.
Press OK.
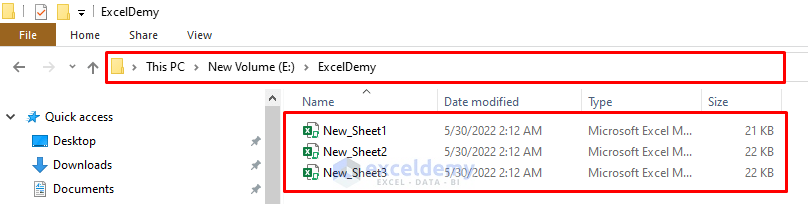
The files will be saved with the new names.
2. Running a Macro to Save All the Worksheets as New Files
This time, we won’t change the names of the sheets.
⧭ VBA Code:
Sub Save_All_Worksheets_as_New_Files()

Set File_Dialog = Application.FileDialog(msoFileDialogFolderPicker)
File_Dialog.AllowMultiSelect = False
File_Dialog.Title = "Select the Directory to Save the File"
If File_Dialog.Show <> -1 Then
    Exit Sub
End If

For i = 1 To Sheets.Count
    Full_Name = File_Dialog.SelectedItems(1) + "\" + Worksheets(i).Name
    Worksheets(i).SaveAs Filename:=Full_Name
Next i

End Sub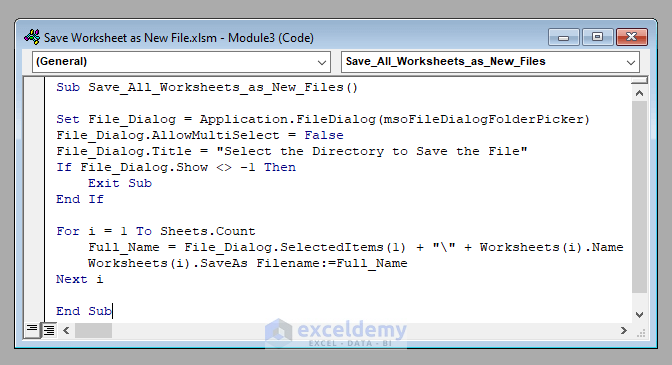
⧭ Output:
Run the code.
A FileDialog box will appear, asking you to select the directory in which you want to save the files, such as the E:\ExcelDemy folder.
Press OK.
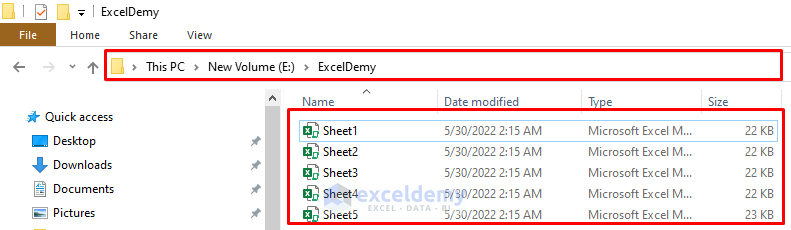
It’ll save all the sheets from your active workbook as new files inside the selected folder.
You can also save and close the workbook using VBA.
Download Practice Workbook
Download this workbook to practice while reading this article.


Good post. Don’t you need to define the objects Sheet_Name, New_File, and File_Dialog?
Hi Tim, thank you for your valuable response. You can declare the variables this way:
Dim File_Dialog as FileDialog
Set File_Dialog = Application.FileDialog(msoFileDialogFolderPicker)
Dim Sheet_Names(2) as Variant
Sheet_Names(0)=”Sheet1″
Sheet_Names(1)=”Sheet2″
Sheet_Names(2)=”Sheet3″
Dim New_File(2) as Variant
New_File(0)=”New_Sheet1″
New_File(1)=”New_Sheet2″
New_File(2)=”New_Sheet3″
But declaring variables beforehand is not mandatory in VBA. You can directly assign values to them as mentioned in the given codes.
Hi
I have found your code and tried running the 2nd version where I define specific sheets that I want to save as a new file.
However, when I open the saved files, all the tabs are there so whilst I have correct file names saved, the workbooks are all the same rather than the specific sheets.
I think I may have missed something somehow!
Yes REL. You’re correct. The potential issue in the code lies in the line:
Worksheets(i).SaveAs Filename:=Full_NameThis line of code saves the entire workbook, not just the individual sheet. As a result, when you open the saved files, you see all the tabs because you saved the entire workbook, not just the specific sheet.If you want to save each sheet of your current workbook as a separate file and not the entire workbook, you can use the following code: