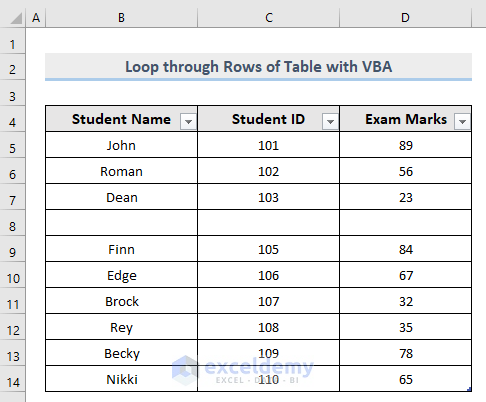
Consider the following dataset, which we’ll use to showcase looping through rows in a table.
Method 1 – Embed VBA to Loop through Each Cell in Every Row of a Table by the Cell Reference Number
Steps:
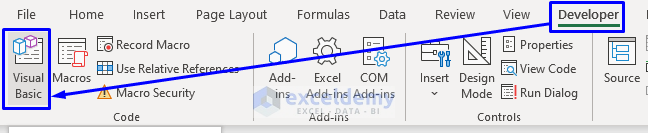
- Press Alt + F11 on your keyboard or go to the tab Developer -> Visual Basic to open the Visual Basic Editor.
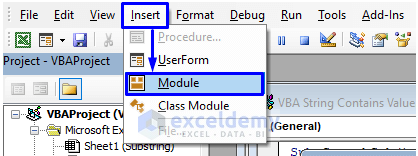
- From the menu bar, click Insert and select Module.
- Copy the following code and paste it into the code window.
Sub LoopThroughRowsByRef()
LastRow = Range("B" & Rows.Count).End(xlUp).Row
FirstRow = 4
i = FirstRow
FirstColumn = 2
Do Until i > LastRow
    LastColumn = Cells(i, Columns.Count).End(xlToLeft).Column
    Count = FirstColumn
    Do Until Count > LastColumn
        MsgBox "Currently iterating cell " & Chr(Count + 64) & i
        Count = Count + 1
    Loop
    i = i + 1
Loop
End Sub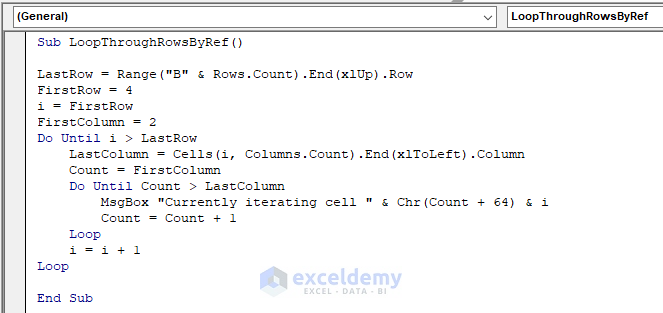
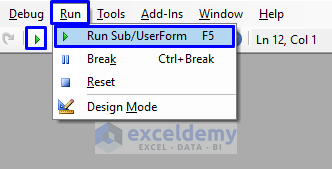
- Press F5 on your keyboard or click on the small Play icon in the sub-menu bar to run the macro.
- You can also save the code and go back to the worksheet.
- Click on Macros from the Developer tab, select the Macro name, and then click Run.
- You will get a pop-up MsgBox showing you the cell reference number of every cell from each row from the table in your Excel sheet.
VBA Code Explanation
LastRow = Range("B" & Rows.Count).End(xlUp).RowGets the last row number in the table by searching column B.
FirstRow = 4Sets row number 4, from where our data starts.
i = FirstRowTo loop from the first row.
FirstColumn = 2Sets column number 2, from where our data starts.
Do Until i > LastRow
    LastColumn = Cells(i, Columns.Count).End(xlToLeft).Column
Start looping through rows to get the last column number by evaluating the current row until the last row.
Count = FirstColumn
Do Until Count > LastColumn
Increment looping the column from the first row until the last row.
MsgBox "Currently iterating cell " & Chr(Count + 64) & i
        Count = Count + 1
    Loop
    i = i + 1
Loop
This piece of code works to process, increment after each iteration and display the result of the code.
Method 2 – Implement VBA to Loop through Each Cell in Every Row by Value
Case 2.1 – With ListObject
Steps:
- Open the Visual Basic Editor from the Developer tab and Insert a Module in the code window.
- Copy the following code in the module.
Sub LoopThroughRowsByList()
Dim iListRow As ListRow
Dim iCol As Range
    For Each iListRow In ActiveSheet.ListObjects("TblStudents").ListRows
        For Each iCol In iListRow.Range
            MsgBox iCol.Value
        Next iCol
    Next iListRow
End Sub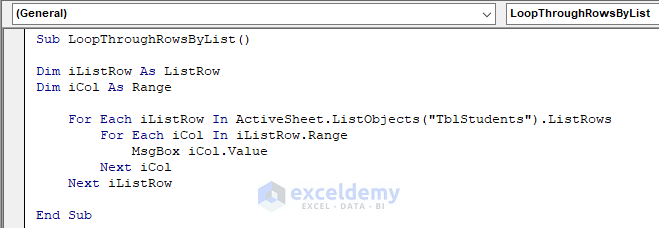
- Run the macro.
- You will get repeated pop-ups with a MsgBox showing you the value carried by every cell from each row from the table in your Excel sheet.
VBA Code Explanation
Dim iListRow As ListRow
Dim iCol As Range
Define the variables.
For Each iListRow In ActiveSheet.ListObjects("TblStudents").ListRows
        For Each iCol In iListRow.Range
            MsgBox iCol.Value
        Next iCol
    Next iListRow
This piece of code first starts looping through rows in the table (“TblStudents” is our table name). Then enters columns for each row. After that, pass the value of the cell in MsgBox. Then go to the next column. After finishing iterating through all columns of one row, then it goes to the next row and continues the iteration process until the last row.
Case 2.2. With the DataBodyRange Property
The DataBodyRange property will show you the result containing the range from the list between the header row and the insert row.
Steps:
- Open the Visual Basic Editor from the Developer tab and Insert a Module in the code window.
- Copy the following code and paste it into the code window.
Sub LoopThroughRowsByRange()
  Dim iRange As Range
  For Each iRange In ActiveSheet.ListObjects("TblStdnt").DataBodyRange
    MsgBox iRange.Value
  Next iRange
End Sub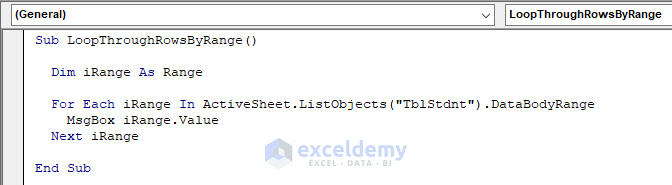
- Run the macro and look at the following gif to see the output.
- You will get a pop-up MsgBox showing you the value carried by every cell from each row from the table in your Excel sheet.
VBA Code Explanation
Dim iRange As RangeDefine the variable.
  For Each iRange In ActiveSheet.ListObjects("TblStdnt").DataBodyRange
    MsgBox iRange.Value
  Next iRange
This piece of code first starts looping through rows in the table (“TblStdnt” is our table name) and returns a range of values excluding the header row of the table. Then pass the value of the range in MsgBox. Then it goes to the next row to extract the range and continues the iteration process until the last row.
Method 3 – Apply VBA Macro to Iterate through Rows by Concatenating Columns in Excel
We will iterate through John in Cell B5 and 101 in Cell C5 by concatenating them and then iterate through John in Cell B5 and 89 in Cell D5 by concatenating them from row 5.
Steps:
- Open the Visual Basic Editor from the Developer tab and Insert a Module in the code window.
- In the code window, copy the following code and paste it.
Sub LoopThroughRowsByConcatenatingCol()
Dim iRange As Range
Dim iValue As String
With ActiveSheet.ListObjects("TblConcatenate")
For Each iRange In .DataBodyRange
If iRange.Column = .DataBodyRange.Column Then
iValue = iRange.Value
Else
MsgBox "Evaluating " & iValue & ": " & iRange.Value
End If
Next iRange
End With
End Sub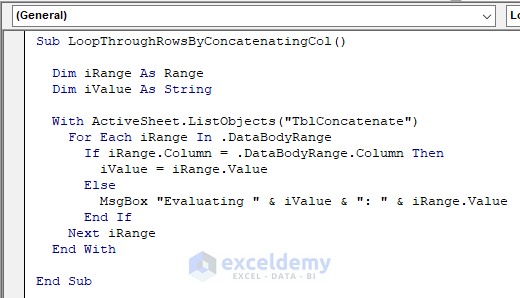
- Run the macro. Look at the gif below to see the result.
You will get a pop-up MsgBox showing you the concatenated value of the cells from the first and the second column (John in Cell B5 from Colum B and 101 in Cell C5 from Column C) and then the concatenated value of the cells from the first and the third column (John in Cell B5 from Colum B and 89 in Cell D5 from Column D) of row number 5 from your dataset. This concatenation operation will keep continuing until it reaches the last row of the table.
VBA Code Explanation
Dim iRange As Range
Dim iValue As String
Define the variable.
With ActiveSheet.ListObjects("TblConcatenate")Then the code selects the table from the active sheet (“TblConcatenate” in our table name).
For Each iRange In .DataBodyRange
If iRange.Column = .DataBodyRange.Column Then
iValue = iRange.Value
After that, starts iterating each row excluding the header of the column. If the iteration finds a match in the range between the column header and the rows then it stores the value in the iValue variable.
Else
MsgBox "Evaluating " & iValue & ": " & iRange.Value
End If
Next iRange
End With
If the above condition doesn’t get fulfilled, then the code throws the value in the MsgBox and finishes the condition. After that, it moves on to looping in another range and continues iterating until the end row. Once it reaches the end row, the macro ends the code execution.
Read More: VBA to Loop through Rows and Columns in a Range in Excel
Method 4 – Embed Macro to Iterate through Rows by Concatenating All Columns in a Table in Excel
Steps:
- Open the Visual Basic Editor from the Developer tab and Insert a Module in the code window.
- Copy the following code and paste it into the code window.
Sub LoopThroughRowsByConcatenatingAllCol()
Dim iObj As Excel.ListObject
Dim iSheet As Excel.Worksheet
Dim iRow As Excel.ListRow
Dim iCol As Excel.ListColumn
Dim iResult As String
Set iSheet = ThisWorkbook.Worksheets("ConcatenatingAllCol")
Set iObj = iSheet.ListObjects("TblConcatenateAll")
For Each iRow In iObj.ListRows
For Each iCol In iObj.ListColumns
iResult = iResult & " " & Intersect(iRow.Range, iObj.ListColumns(iCol.Name).Range).Value
Next iCol
MsgBox iResult
iResult = ""
Next iRow
End Sub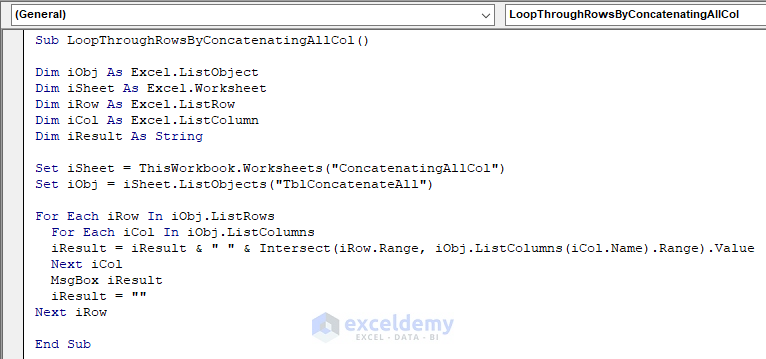
- Run the macro code.
- You’ll get repetitive pop-up MsgBox showing you the concatenated value of all the columns residing in every row from the table of your Excel worksheet.
VBA Code Explanation
Dim iObj As Excel.ListObject
Dim iSheet As Excel.Worksheet
Dim iRow As Excel.ListRow
Dim iCol As Excel.ListColumn
Dim iResult As String
Define the variables.
Set iSheet = ThisWorkbook.Worksheets("ConcatenatingAllCol")Set the sheet name that we will work with (“ConcatenatingAllCol” is the sheet name in the workbook).
Set iObj = iSheet.ListObjects("TblConcatenateAll")Define the table name that we will work with (“TblConcatenateAll” is the table name in our dataset).
For Each iRow In iObj.ListRowsStarts iteration through each row of the table.
For Each iCol In iObj.ListColumnsStarts iteration through each column of each row of the table.
iResult = iResult & " " & Intersect(iRow.Range, iObj.ListColumns(iCol.Name).Range).Value
Next iCol
MsgBox iResult
iResult = ""
Next iRow
Store the result by intersecting the values each column of each row carries. After scanning through all the columns residing in each row, it passed the result in the MsgBox. Then again starts looping in the next row and continues looping until it reaches the last row of the table.
Read More: Excel VBA: Loop Through Columns in Range
Method 5 – Stop Iteration If Value Found by Looping through Rows of a Table with VBA Macro
Steps:
- Open the Visual Basic Editor from the Developer tab and Insert a Module in the code window.
- In the code window, copy the following code and paste it.
Sub LoopThroughRowsForValue()
Dim iData As Range
For Each iData In Range("1:15")
If iData.Value = "Edge" Then
MsgBox "Edge is found at " & iData.Address
End If
Next iData
End Sub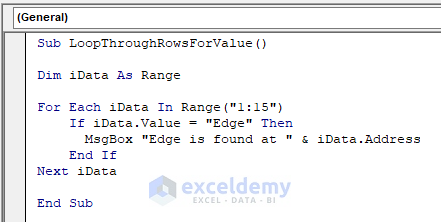
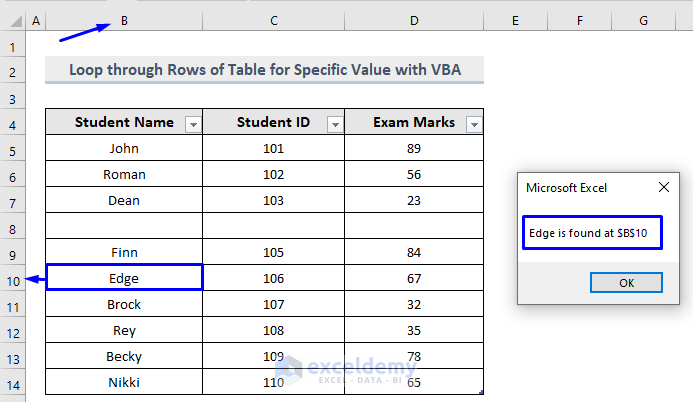
- Run the macro.
- It will start the loop and stop it when it finds the specific value (“Edge”) in the range and throws the result in the MsgBox.
VBA Code Explanation
Dim iData As RangeDefine the variable.
For Each iData In Range("1:15")
If iData.Value = "Edge" Then
MsgBox "Edge is found at " & iData.Address
End If
Next iData
This piece of code is here for looping through rows from 1 to 15. If it finds the specific word “Edge” then it passes the result with the cell address that holds the word. It continues to do this until it finishes scanning through all the data from rows 1 to 15 in searching for the word.
Method 6 – VBA to Loop through Each Row and Color a Specific Value in Excel
Steps:
- Open Visual Basic Editor from the Developer tab and Insert a Module in the code window.
- Copy the following code and paste it into the code window.
Sub LoopThroughRowsAndColor()
Dim iData As Range
For Each iData In Range("1:15")
If iData.Value = "Edge" Then
iData.Interior.ColorIndex = 8
End If
Next iData
End Sub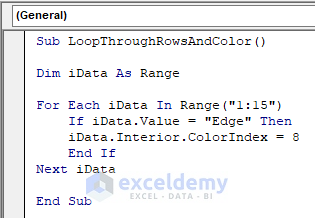
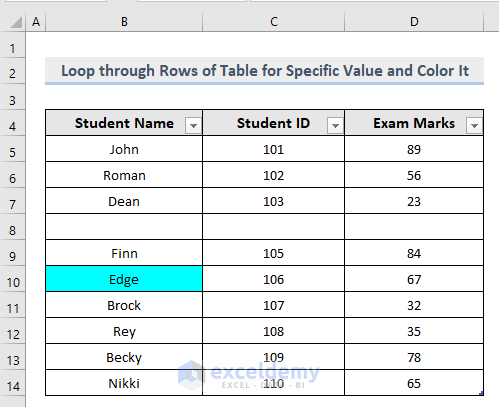
- Run the macro.
- It will start the loop and stop it when it finds the specific value (“Edge”) in the range and color the cell with the ColourIndex provided in the code.
VBA Code Explanation
Dim iData As RangeDefine the variable.
For Each iData In Range("1:15")
If iData.Value = "Edge" Then
iData.Interior.ColorIndex = 8
End If
Next iData
This piece of code is here for looping through rows from 1 to 15. If it finds the specific word “Edge” then it colors the cell that holds the word. It continues to do this until it finishes scanning through all the data from rows 1 to 15 in searching for the word.
Method 7 – Implement VBA to Loop through Each Row and Color Every Odd Row in Excel
Steps:
- Open the Visual Basic Editor from the Developer tab and Insert a Module in the code window.
- Copy the following code and paste it into the code window.
Sub LoopThroughRowsAndColorOddRows()
Dim iRow As Long
With Range("B4").CurrentRegion
For iRow = 2 To .Rows.Count
If iRow / 2 = Int(iRow / 2) Then
.Rows(iRow).Interior.ColorIndex = 8
End If
Next
End With
End Sub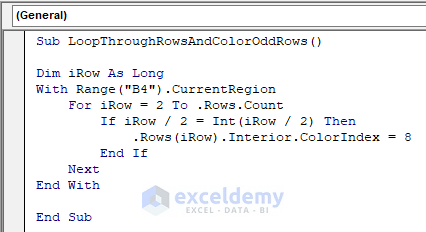
- Run the macro and look at the following image to see the output.

VBA Code Explanation
Dim iRow As LongDefine the variable.
With Range("B4").CurrentRegionDefine the range that we will work with.
For iRow = 2 To .Rows.Count
If iRow / 2 = Int(iRow / 2) Then
.Rows(iRow).Interior.ColorIndex = 8
End If
Next
End With
This part of the code refers to the iteration through all the rows, starting from the next row of the current row, B4. If the mod of dividing the row numbers by 2 is equal to the returned row number stored in an integer type, then this code colours all the rows that are extracted by the calculation with the Color Index provided in the code. It keeps moving through all the rows until it reaches the end of the range.
Method 8 – Implement VBA to Loop through Rows and Color Every Even Row in Excel
Steps:
- Open the Visual Basic Editor from the Developer tab and Insert a Module in the code window.
- Copy the following code and paste it into the code window.
Sub LoopThroughRowsAndColorEvenRows()
Dim iRow As Long
With Range("B4").CurrentRegion
For iRow = 3 To .Rows.Count Step 2
.Rows(iRow).Interior.ColorIndex = 8
Next
End With
End Sub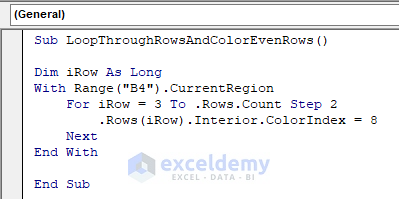
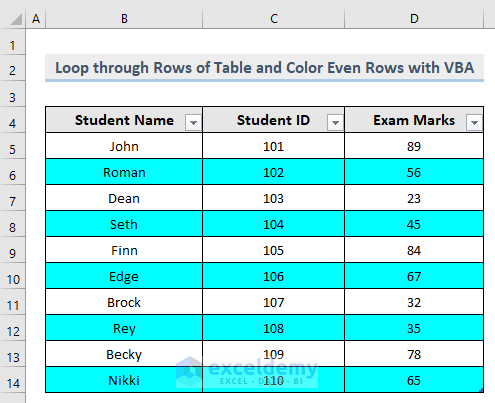
- Run the macro and look at the following image to see the result.
VBA Code Explanation
Dim iRow As LongDefine the variable.
With Range("B4").CurrentRegionDefine the range that we will work with.
For iRow = 3 To .Rows.Count Step 2
.Rows(iRow).Interior.ColorIndex = 8
Next
End With
This piece of code starts iterating after the three rows from the current row, B4. It colors it first then increments the row count by 2 and keeps coloring it until it reaches the last row of the dataset.
Method 9 – Apply Macro to Iterate through Rows Until You Reach a Blank Cell in Excel
Case 9.1 – With a For Loop
Steps:
- Open the Visual Basic Editor from the Developer tab and Insert a Module in the code window.
- Copy the following code and paste it into the code window.
Sub ForLoopThroughRowsUntilBlank()
Dim x As Integer
Application.ScreenUpdating = False
NumRows = Range("B4", Range("B4").End(xlDown)).Rows.Count
Range("B4").Select
For x = 1 To NumRows
ActiveCell.Offset(1, 0).Select
Next
Application.ScreenUpdating = True
End Sub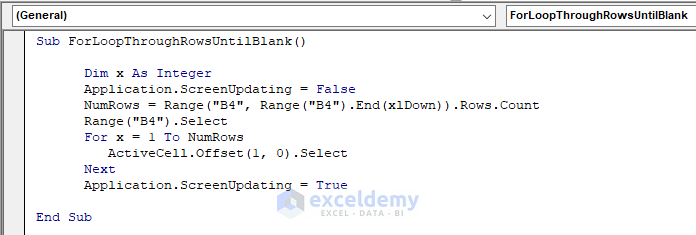
- Run the macro and the result is shown in the gif below.
- Excel will select the first blank cell in the dataset.
VBA Code Explanation
Dim x As IntegerDefine the variable.
Application.ScreenUpdating = FalseTurn off the screen updating event.
NumRows = Range("B4", Range("B4").End(xlDown)).Rows.CountStore all the rows starting from Cell B4 till the last one.
Range("B4").SelectSelect Cell B4.
For x = 1 To NumRows
ActiveCell.Offset(1, 0).Select
Next
This piece of code starts looping through all the rows. When it finds an empty cell in a row then selects it and continues scanning the rows until it reaches the end.
Application.ScreenUpdating = TrueTurn on the screen updating event.
Case 9.2 – With a Do-Until Loop
Steps:
- Open the Visual Basic Editor from the Developer tab and Insert a Module in the code window.
- Copy the following code and paste it into the code window.
Sub DoUntilLoopThroughRowsUntilBlank()
Range("B4").Select
Do Until IsEmpty(ActiveCell)
ActiveCell.Offset(1, 0).Select
Loop
End Sub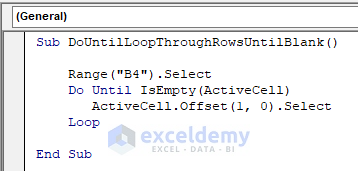
- Run the macro. The result is shown in the following gif.
- The blank cell is selected.
VBA Code Explanation
Range("B4").SelectSelect the cell that we will work from.
Do Until IsEmpty(ActiveCell)Starts and continues looping until an empty cell is found.
ActiveCell.Offset(1, 0).Select
Loop
When an empty cell is found in a row then select it and stop the iteration.
Read More: Excel VBA to Loop through Range until Empty Cell
Method 11 – VBA Macro to Iterate through Rows Until It Finds Multiple Blank Cells in Excel
Steps:
- Open the Visual Basic Editor from the Developer tab and Insert a Module in the code window.
- Copy the following code and paste it into the code window.
Sub LoopThroughRowsUntilMultipleBlank()
Range("B4").Select
Do Until IsEmpty(ActiveCell) And IsEmpty(ActiveCell.Offset(1, 0))
ActiveCell.Offset(2, 0).Select
Loop
End Sub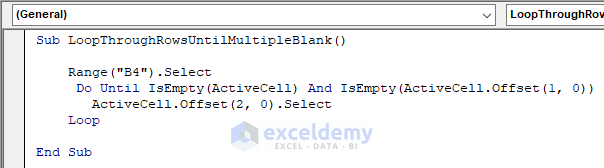
- Run the macro and see the following gif for the output.
- The macro stopped when it found two consecutive blank cells on Cell B16.
VBA Code Explanation
Range("B4").SelectSelect the cell that we will work from.
Do Until IsEmpty(ActiveCell) And IsEmpty(ActiveCell.Offset(1, 0))Starts and continues looping until two consecutive empty cells are found.
ActiveCell.Offset(2, 0).Select
Loop
When two consecutive empty cells are found, then select it and stop the iteration.
Method 11 – Embed VBA to Loop through Rows by Concatenating All Columns Until a Blank Is Found in Excel
Steps:
- Open the Visual Basic Editor from the Developer tab and Insert a Module in the code window.
- Copy the following code and paste it into the code window.
Sub ConcatenatingAllColUntilBlank()
Dim iSheet As Worksheet
Dim iValue As Variant
Dim iResult As String
Set iSheet = Sheets("ConcatenatingAllColUntilBlank")
iValue = Range("B4").CurrentRegion
For i = 2 To UBound(iValue, 1)
iResult = ""
For J = 1 To UBound(iValue, 2)
iResult = IIf(iResult = "", iValue(i, J), iResult & " " & iValue(i, J))
Next J
MsgBox iResult
Next i
End Sub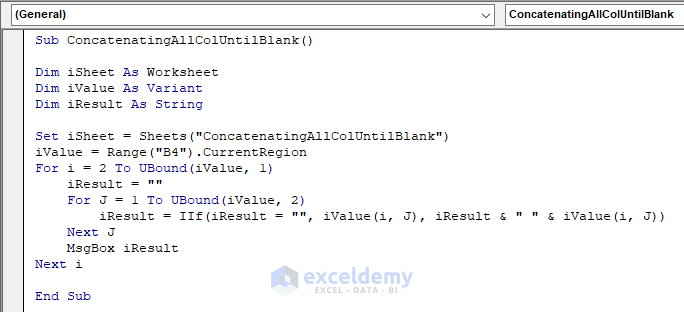
- Run the macro and see the following gif for the result.
- You will get a pop-up MsgBox showing you the concatenated value of all the columns residing in every row from the table of your Excel worksheet. This stopped once it reached the blank cell.
VBA Code Explanation
Dim iSheet As Worksheet
Dim iValue As Variant
Dim iResult As String
Define the variables.
Set iSheet = Sheets("ConcatenatingAllColUntilBlank")Set the sheet name that we will work with (“ConcatenatingAllColUntilBlank” is the sheet name in the workbook).
iValue = Range("B4").CurrentRegionDefine the range that we will work with.
For i = 2 To UBound(iValue, 1)
iResult = ""
For J = 1 To UBound(iValue, 2)
iResult = IIf(iResult = "", iValue(i, J), iResult & " " & iValue(i, J))
Next J
MsgBox iResult
Next i
This piece of code starts the loop with the array. It continues to loop until it returns the largest subscript of the array and the lower bound of the first dimension. Then it enters the iteration of extracting the lower bound of the second dimension. After that, it passes all the extracted values in the iResult variable by concatenating them and throwing the result in the MsgBox. It continues to do that until it finds an empty cell.
Download the Workbook
You can download the free practice Excel workbook from here.
Get FREE Advanced Excel Exercises with Solutions!

Hello, very helpful article. I have a specific real-world example for which I’m having trouble getting my macros to work properly. You could probably figure this out in a few minutes, but I’m pretty rusty with my coding skills. I would compensate you for your time helping out with this if you’re open to it. Thanks!
Hi MIKE M,
Sorry for the late reply. I am replying to you on behalf of Exceldemy. You can mail your problem to [email protected]. Our team will take a look and try to give a solution to your problem.
Thanks!
Can you post examples that can actually be useful in the real world? You cannot DO anything with message boxes and you can color cells just fine with the built in conditional formatting. Can you post how to loop through a row of data, identify data, copy that data and paste it? This is great but useless.
Hi CHRIS,
Thanks for your comment. I am replying to you on behalf of Exceldemy. We can use VBA to loop through rows of data and extract the desired data.
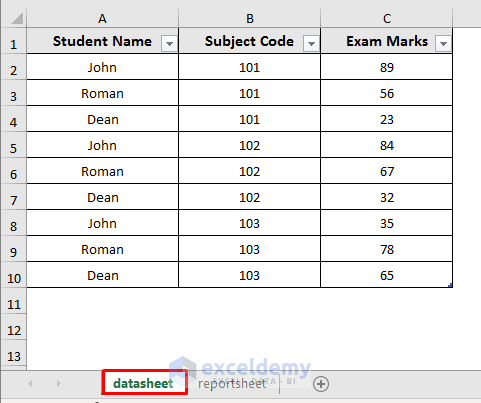
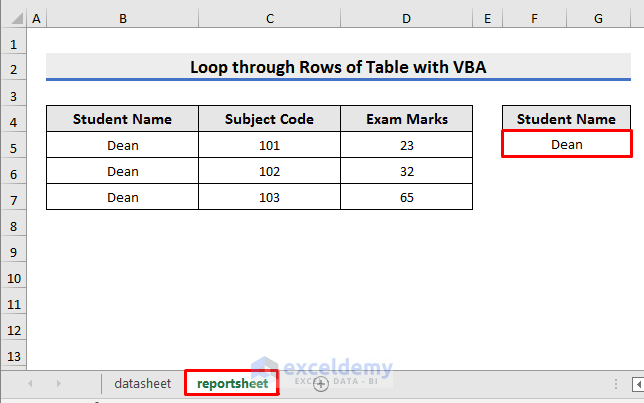
For example, we will use a VBA to look for the marks of a specific student in the datasheet, copy them and paste the marks into the reportsheet. You can see the marks of all students in the picture below:
We will copy the marks of a specific student and paste them into the reportsheet.
For that purpose, you can use the code below:
Sub Loop_Through_and_Extract_Data()Dim datasheet As Worksheet 'From where data will be copiedDim reportsheet As Worksheet 'where data will be pastedDim StudentName As StringDim finalrow As IntegerDim i As Integer 'row counter'set variablesSet datasheet = Sheet1Set reportsheet = Sheet3StudentName = reportsheet.Range("F5").Value 'Cell F5 of reportsheet contains the student name'clear old datareportsheet.Range("B5:D200").ClearContents'go to datasheet and start searching and copyingdatasheet.Selectfinalrow = Cells(Rows.Count, 1).End(xlUp).Row'loop through rows to find matching recordsFor i = 2 To finalrowIf Cells(i, 1) = StudentName Then 'if the name matches, then copyRange(Cells(i, 1), Cells(i, 3)).Copy 'copy columns 1 to 3 (A to C)reportsheet.Select 'go to reportsheetRange("B200").End(xlUp).Offset(1, 0).PasteSpecial xlPasteAll 'paste values in the reportsheetdatasheet.Select 'go back to datasheet and continue searchingEnd IfNext ireportsheet.SelectRange("A1").SelectEnd SubI have also attached the Excel file below:
Loop Through Rows.xlsm
I hope this will help to solve your problem. Please let us know if you have other queries.
Thanks!
Thanks for all the code examples. A couple of pointers if I may.
1. Prefix you variables with something helpful:
Prefixing variables is a good idea, it straight away shows the reader it is a variable, it might tell you something about the variable (eg what type it is), it makes it less likely to be a reserved word (eg you can have a variable called “iRange” but not “range”)
Unfortunately, you have prefixed ALL your variables with “i”, for example above you have:
Dim iSheet As Excel.Worksheet
Dim iRow As Excel.ListRow
Dim iCol As Excel.ListColumn
Dim iResult As String
Whereas something like this would be much more helpful:
Dim wsSheet As Excel.Worksheet
Dim lrRow As Excel.ListRow
Dim lcCol As Excel.ListColumn
Dim sResult As String
It also gives the added benefit in that I know the type if each variable (ie sRESULT is a string), simple types (string, long double…) have a single letter prefix and objects (worksheet, ListRow, ListColumn) have a double prefix, plus it means I give variables a helpful name but still know what they are eg:
Dim wsConCat as Excel.Worksheet
2. Indenting code makes it much easier to read, particularly if you nested loops, for example when you have a piece of code like this:
MsgBox “Currently iterating cell ” & Chr(Count + 64) & i
Count = Count + 1
Loop
i = i + 1
Loop
It is so much more readable if you add indenting:
MsgBox “Currently iterating cell ” & Chr(Count + 64) & i
Count = Count + 1
Loop
i = i + 1
Loop
Hello David,
Thanks for your valuable suggestions.
Regards
ExcelDemy