Sometimes, you may have a large dataset, but you want to print the selected area in Excel on one page. You can do it easily by applying 3 easy methods which we will discuss below. I hope you will soon get rid of issues to print selected area in Excel on one page after reading this tutorial.
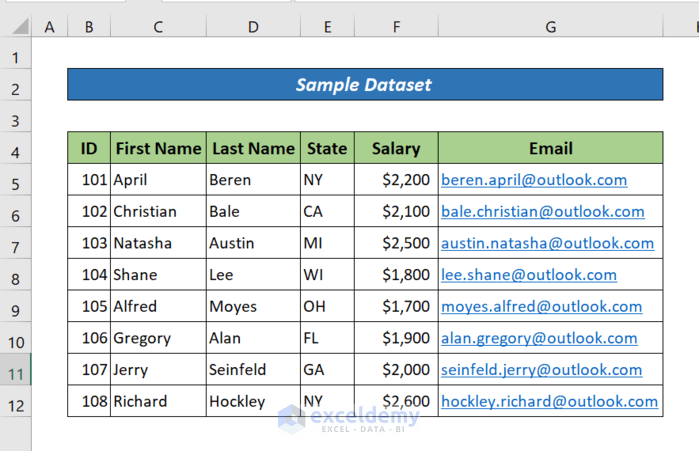
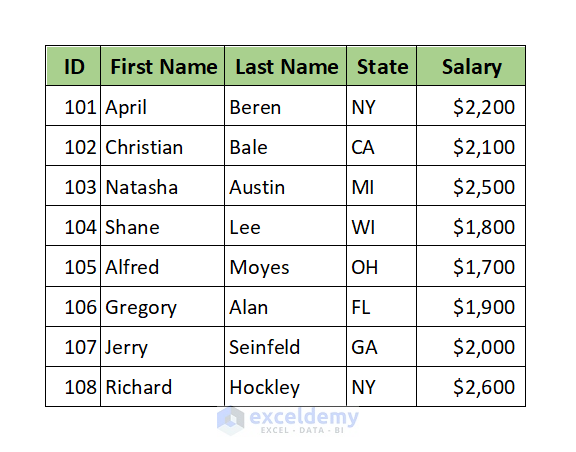
Here, we have a dataset in an Excel worksheet. Our goal is to print the selected area in this worksheet on one page.
1. Using File Tab to Print Selected Area in Excel on One Page
The easiest way to print a selected area on one page is to use the File tab. You just need to follow the steps below.
Steps:
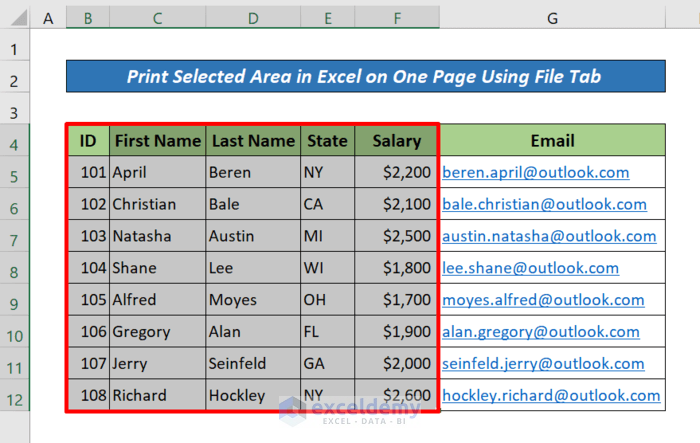
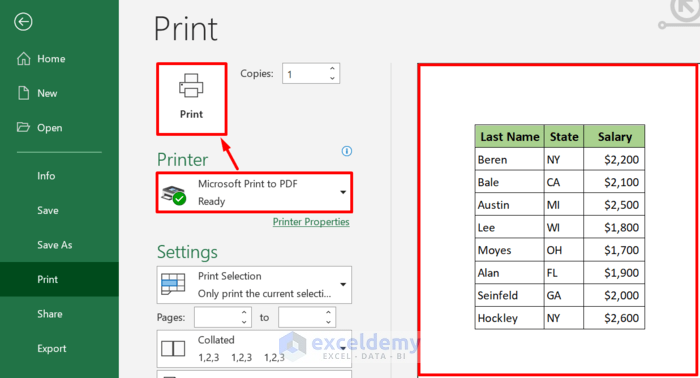
- Select the area that you need to print. Here we have selected B4:F12.
- press CTRL+P.
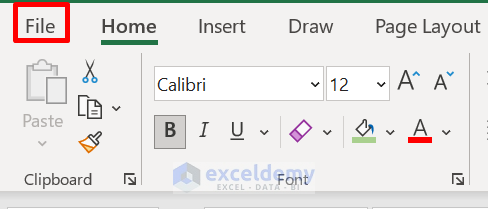
Or, click the File tab from the top-left corner of the window.
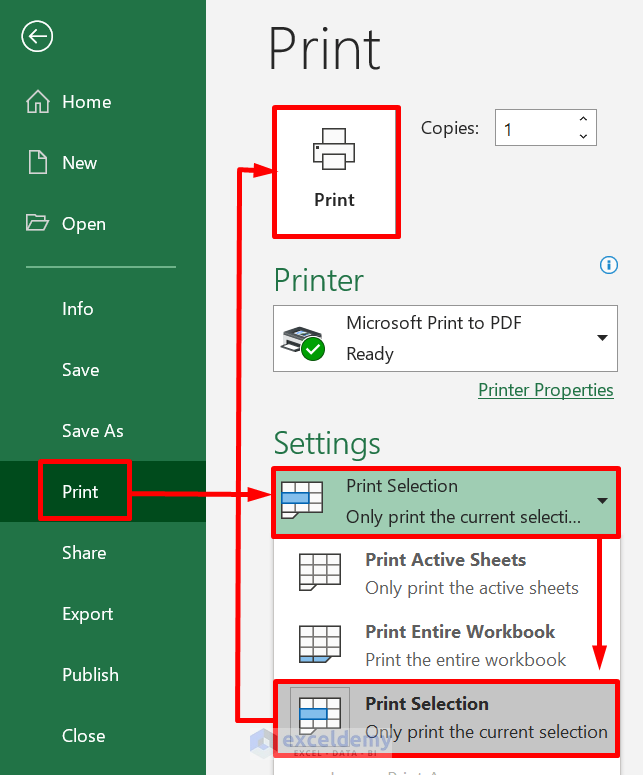
- Click Print.
- Now, click on the first option in Settings.
- Select the Print Selection.
- Lastly, click on the Print button. It will print only the current selection of the page.
Here is the printed page,
Read More: How to Print Selected Area in Excel
2. Printing Selected Area in Excel on One Page with Page Layout tab
Another easy way to print specific areas in an Excel worksheet is to use the Page Layout tab. Just follow the steps below.
Steps:
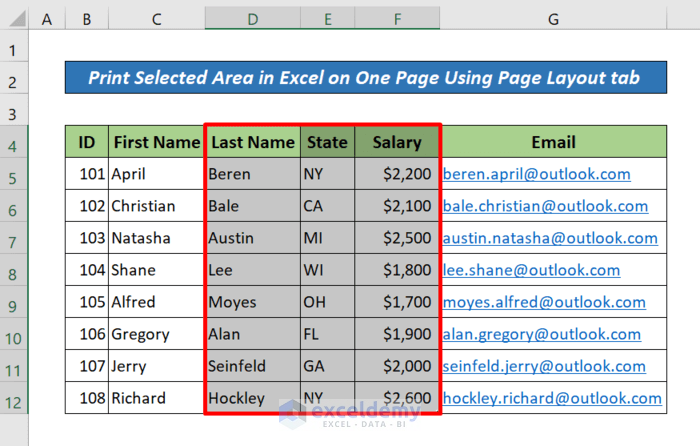
- Select the range of cells D5:F12 or the area you want to print out.
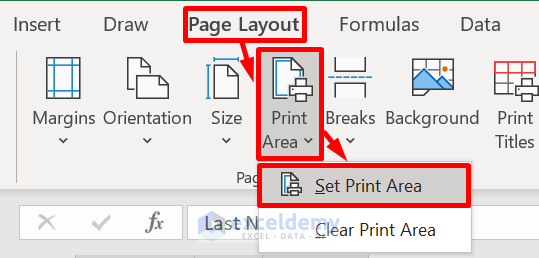
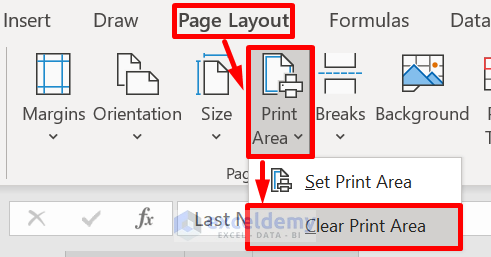
- Go to the Page Layout tab > the Print Area drop-down > the Set Print Area option.
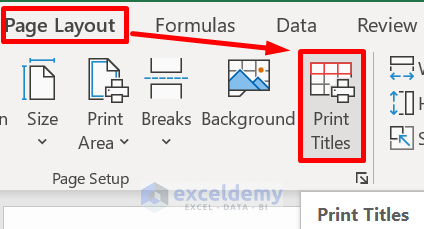
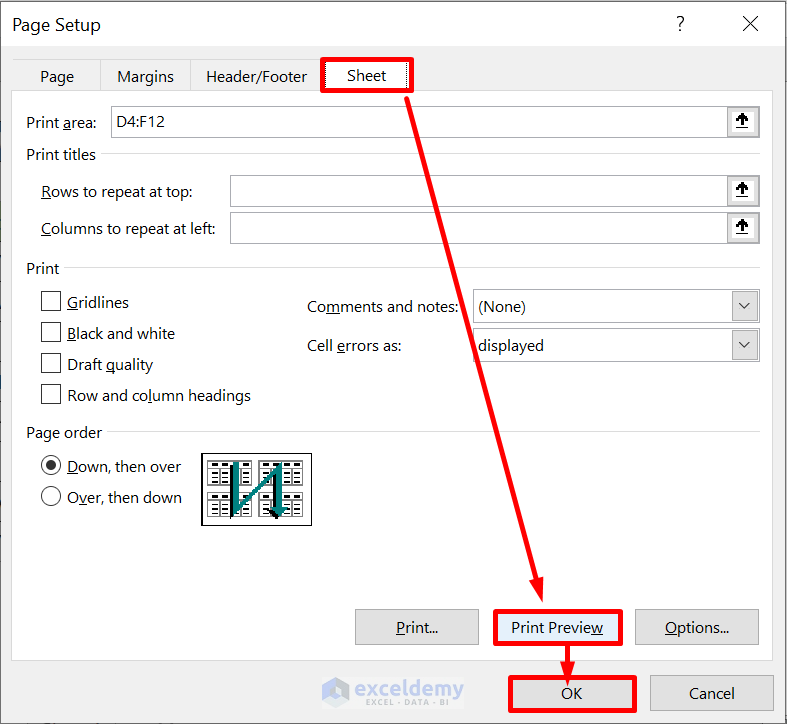
- Now, click Print Titles under the Page Layout. A Page Setup window will pop up.
- Go to the Sheet Click on Print Preview. You will see a preview of the specific area that you want to print.
- Now, select the printer you want to use from the Print option of the File
- Click on the Print button.
Note:
The print area that you set will be saved when you save the Excel workbook. If you want to clear the selected area, then click Print Area under Page Layout, select Clear Print Area.
Read More: How to Set Print Area in Excel
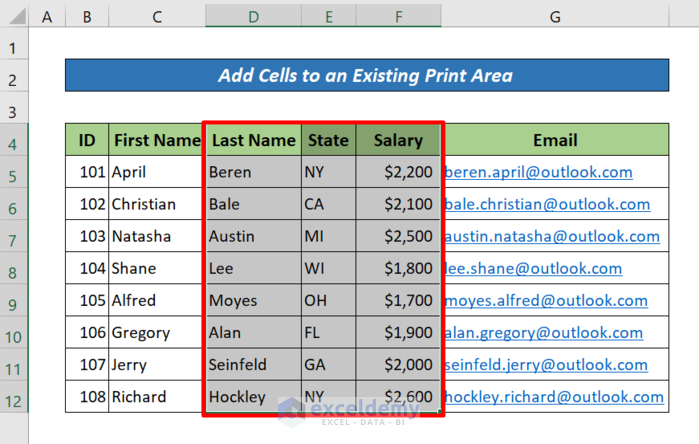
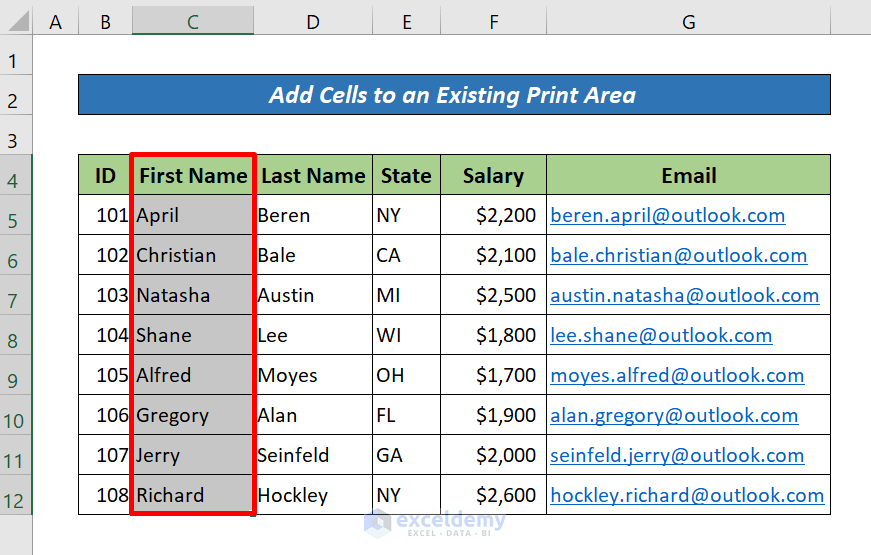
3. Adding Cells to Already Selected Print Area in Excel
You can add new cells to your previous selected print area (In this case, we will add all the cells of the column titled “First Name” to our previous method’s print area). For this, you need to follow the steps below.
Steps:
- Select the cells that you need to add to the current print area.
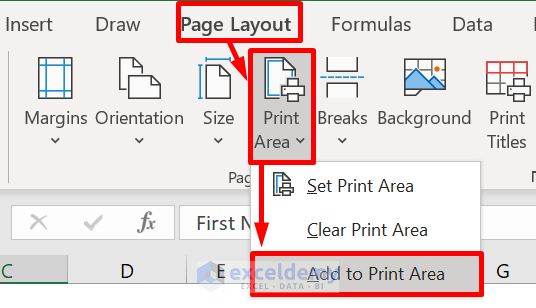
- Go to the Page Layout tab > the Page Setup group > the Print Area drop-down > the Add to Print Area option. Now, after saving the workbook, the print area will be saved.
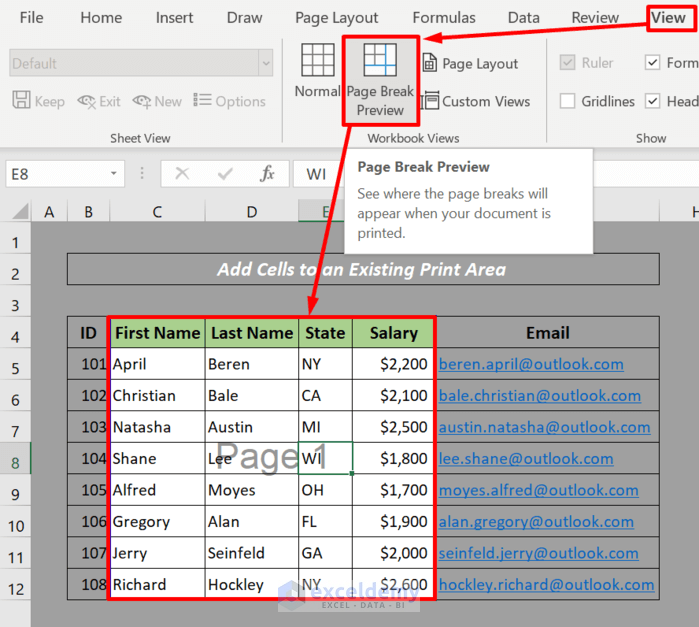
If you want to view all the print areas, click View> Page Break Preview from the Workbook Views group.
Note:
If the cells that you need to join are not adjacent to the current print area, another print area will be created. Each print area in a worksheet will be printed separately. Only adjacent cells can be adjusted to a current print area and can be printed on one page.
Download Practice Book
Download the following Excel file for your practice.
Conclusion
In this tutorial, I have discussed 3 easy methods of how to print selected area in Excel on one page. I hope you found this article helpful. Please, drop comments, suggestions, or queries if you have any in the comment section below.
Related Articles
- How to Set Print Area with Blue Line in Excel
- How to Set Print Area for Multiple Pages in Excel
- How to Center the Print Area in Excel
<< Go Back to Print Area | Page Setup | Print in Excel | Learn Excel
Get FREE Advanced Excel Exercises with Solutions!
