In data entry practice, we regularly need to add new entries between rows. Adding new rows or shifting cells down is very important for adding new entries in between a dataset. In this tutorial, we will discuss how to shift cells down in Excel.
In this tutorial, we will be discussing a total of five different ways you can shift cells down in Excel. We will perform all of them in the following dataset.
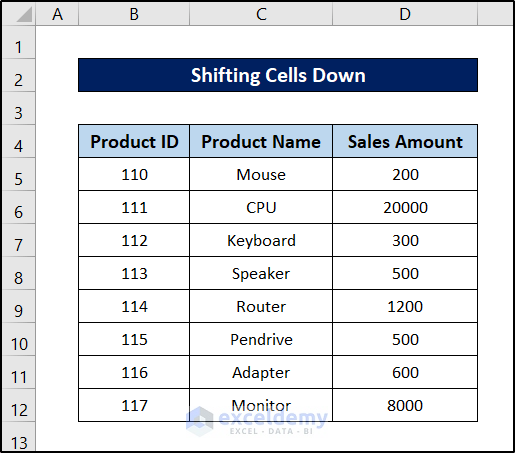
Here, we have designated each of them in their own subsections. Keep reading to see how each of them works, or find the one you need from the table above.
1. Using Keyboard Shortcut to Shift Cells Down in Excel
If you need an efficient and time-saving way, this shortcut will match your demand perfectly. It varies whether you’re on Windows or Mac. For Mac, hold down the option key while pressing the return key. The following steps are for windows:
Steps:
- First, select the cell or cell range you want to push down.
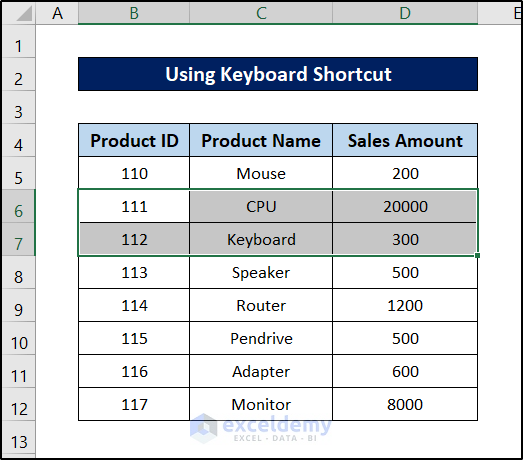
- Then press the shortcut Ctrl+Shift+”+” on your keyboard.
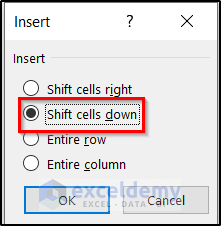
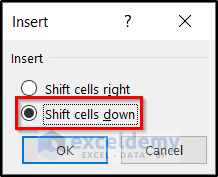
- As a result, the Insert box will pop up.
- Now select Shift cells down in this box and click on OK.
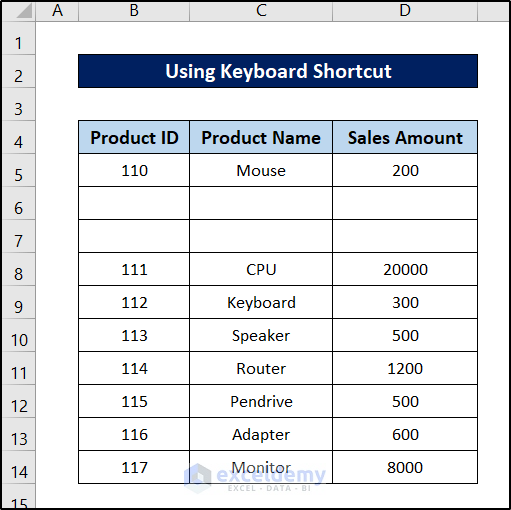
- Finally, the dataset will now look like this.
Read More: How to Shift Cells Right in Excel
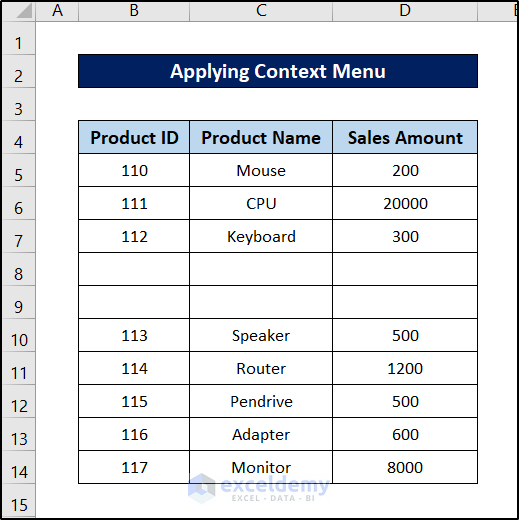
2. Applying Context Menu to Shift Cells Down in Excel
Right-clicking, also called secondary clicking, refers to pressing the right button of the mouse. It makes workflow faster and reduces the time spent looking over a tab or ribbon. Follow these steps for the procedure.
Steps:
- First, select the cell or a collection of cells (cell range).
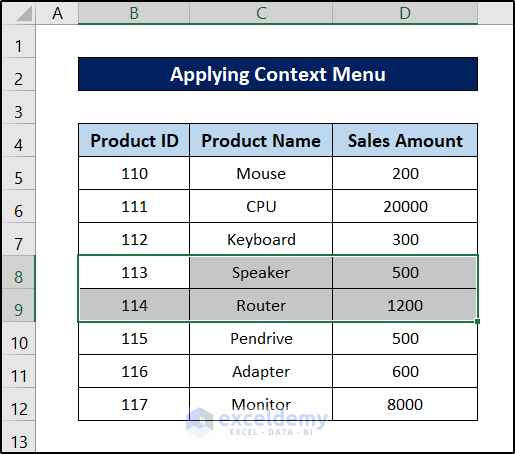
- Then right-click on the selection.
- After that, choose the Insert option from the context menu.
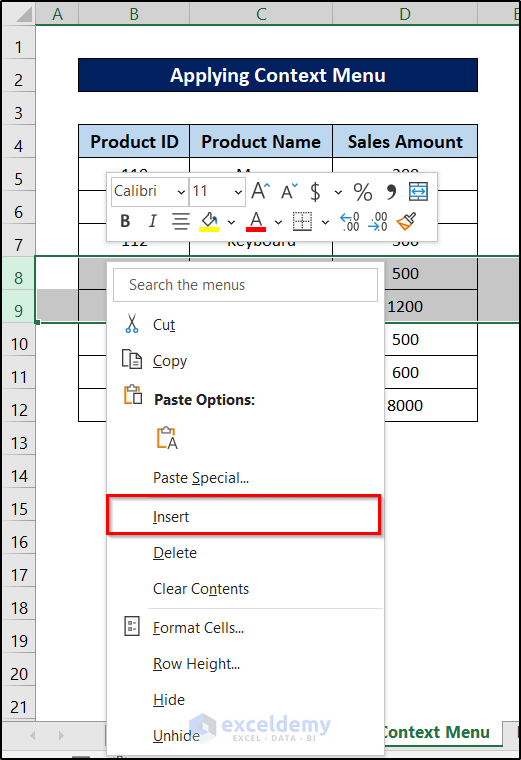
Thus you will see this will shift the cells down in the Excel spreadsheet.
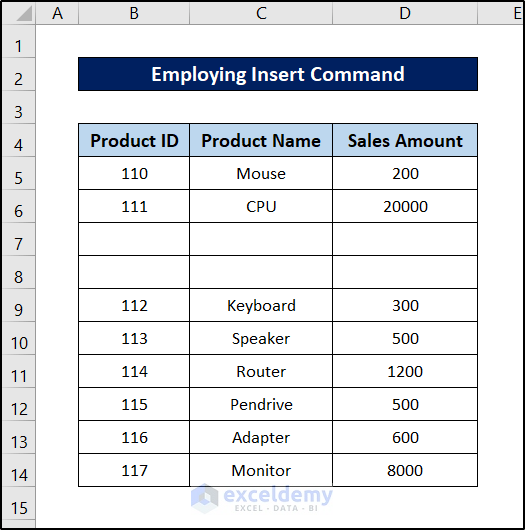
3. Using Insert Command from Cells Dropdown for Shifting Cells Down
There is an Insert command on the Home tab. You can utilize the feature to shift cells down in Excel.
Steps:
- First, select the cell or cell range.
- Then go to the Home tab of your ribbon.
- Now select the Insert command from the Cells group section.
- After that, select Insert Cells from the drop-down menu.
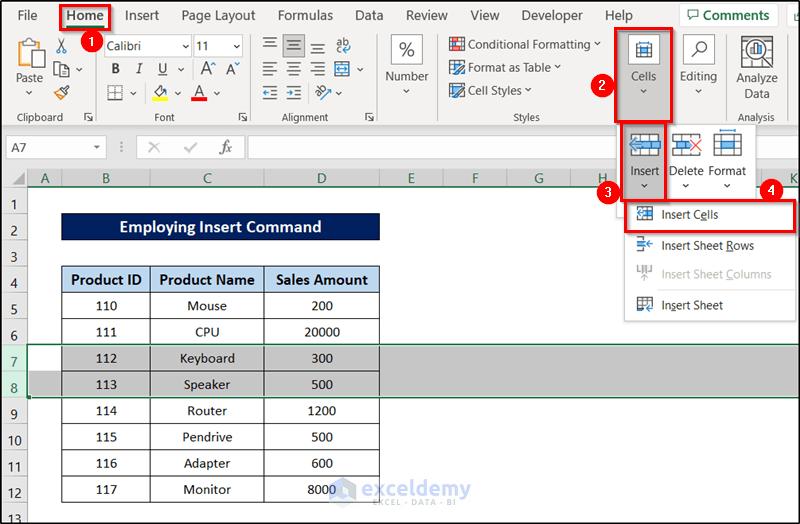
As a result, the cells will now shift down on the same Excel spreadsheet.
4. Shifting Cells Down in Excel Through Copy-Paste Feature
We can use the copy-paste feature along with shifting cells downwards in Excel. This is helpful when we have to insert an already existing row in the dataset and we need them in between rows. In this way, we do not have to manually enter those values again or copy-paste them afterward. Follow these steps to shift cells down along with copy-paste with this helpful feature in Excel.
Steps:
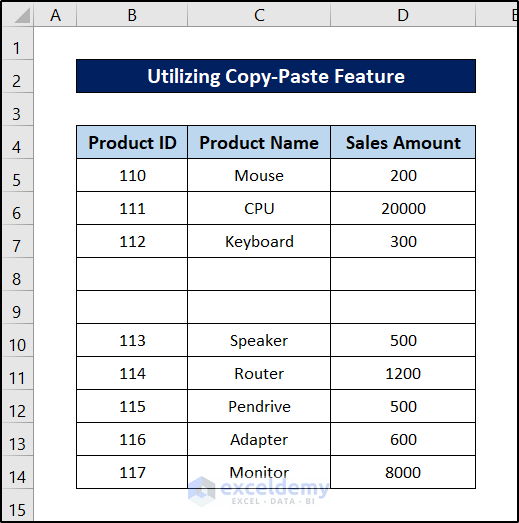
- First, select the cells you want to insert. Here, we are selecting the last two rows of the dataset.
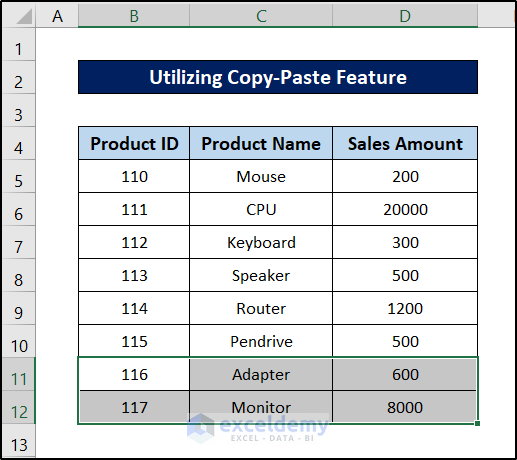
- Now copy those cells by pressing Ctrl+C on your keyboard.
- Then select any cell in the row before which you want to insert the copied cells. We are selecting cell B8 for the demonstration.
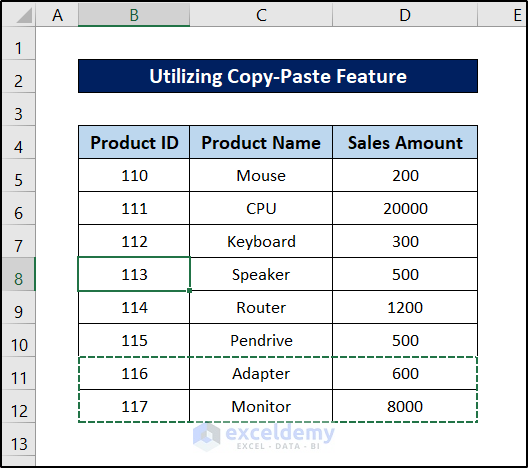
- After that, select Insert from the Cells group of the Home tab on your ribbon.
- Next, select Insert Copied Cells from the drop-down menu.
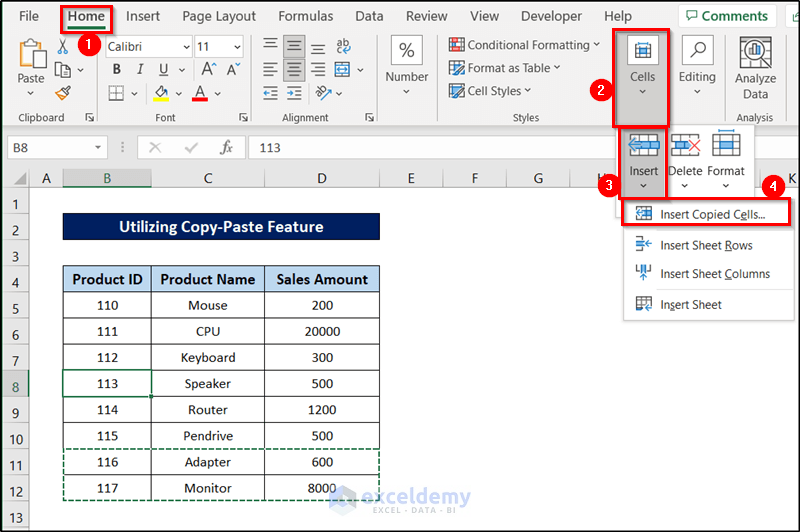
- Finally, select Shift cells down from the Insert box and click on OK.
Then Excel will paste those cells before cell B8 and shift the rest of the cells down.
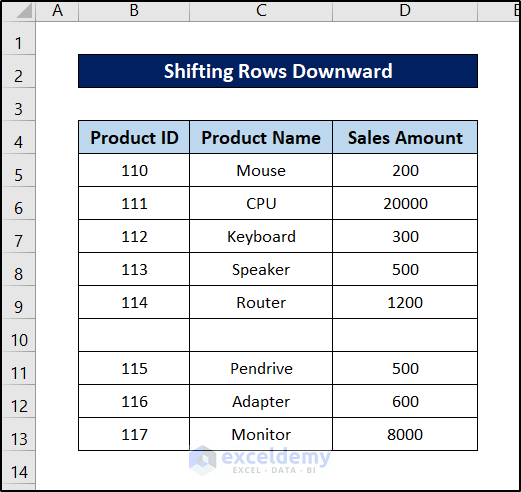
5. Shifting Rows Downward in Excel
Sometimes you may require to shift a collection of horizontal cells (also called a row) down in a row. For this, you have to follow the following procedure.
Steps:
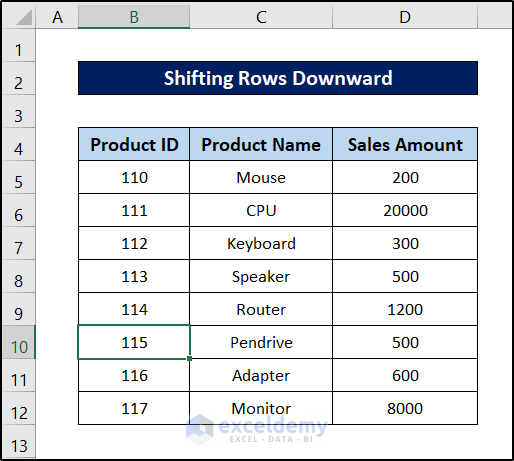
- First, select any cell in the row before which you want another row. We are selecting cell B10 for the demonstration.
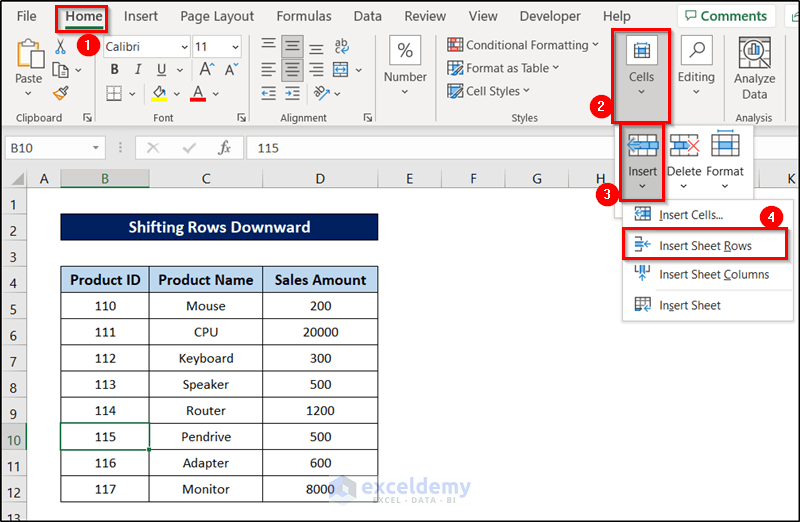
- After that, go to the Home tab on your ribbon.
- Then select Insert from the Cells group section.
- Now select Insert Sheet Rows from the drop-down menu.
Finally, Excel will insert a new row before the cell and shift the rest of the cells down.
Read More: How to Shift Cells Up in Excel
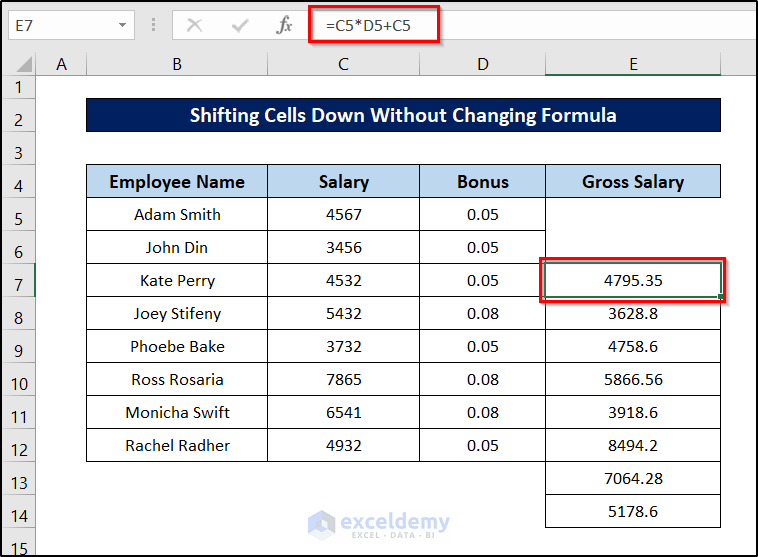
How to Shift Cells Down in Excel Without Changing Formula
Normally Formulas are associated with the referenced cell but for any reason or circumstance if you want or wish to shift cells down in Excel without changing the formulas then you are allowed to do it by following certain ways.
Let’s see the following dataset containing formulas in column E.

You can follow these steps to shift cells down in Excel without changing any formula.
Steps:
- First, select the column you want to shift. We are selecting the range E5:E12 for the demonstration.
- Then move your cursor to the edge of the selection (not in the corners) and you will notice the cursor style changing.
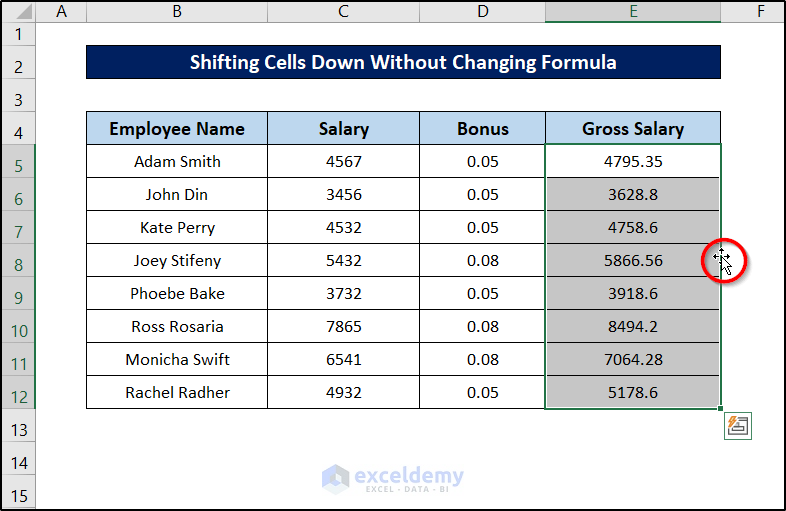
- Now click on it and drag the cells down to where you want the range to be.
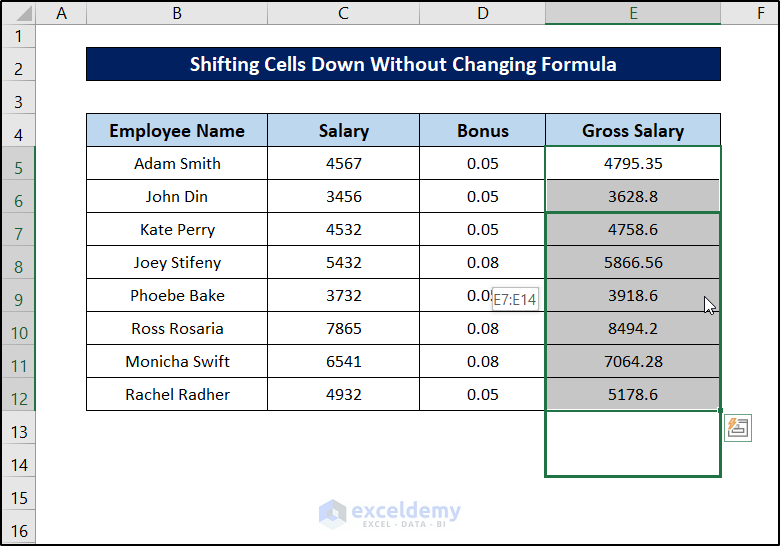
- After that, release the click.
This will shift these cells down in Excel without changing the formula.
How to Shift Rows Down in Excel
Now suppose you want to rearrange the cells. You want to shift one of the rows in a dataset up/down and the rest down/up in Excel. You can achieve that with another trick too. There is a feature- holding the Shift key and dragging your cells to reposition your cells. You can use this to your advantage and shift rows or cells down in Excel.
Follow these steps for more details of the process.
Steps:
- First, select the row you want to push down.
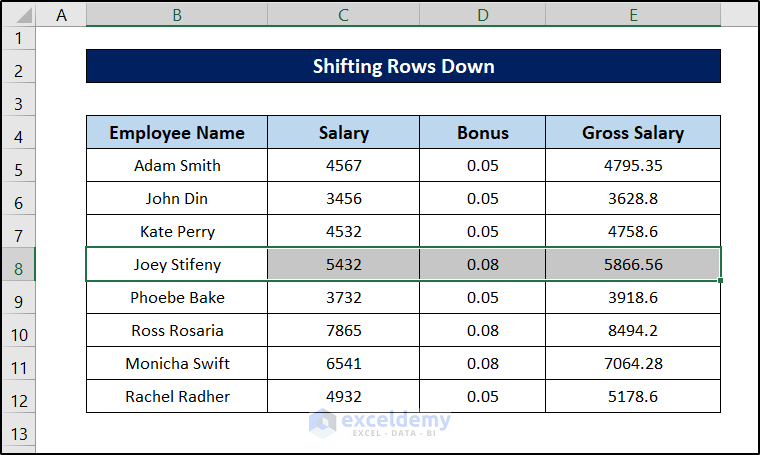
- Then hover your mouse over the border of the selection and you will notice the cursor style change.
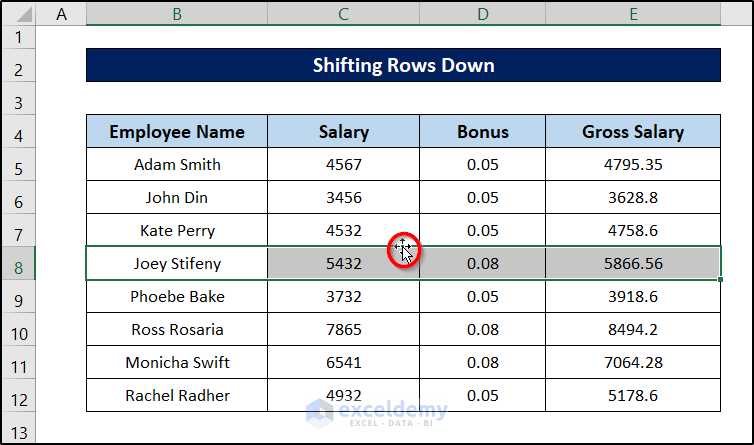
- While the cursor is in this style, press Shift on your keyboard and click and drag the selection down to the position where you want the selection to be.
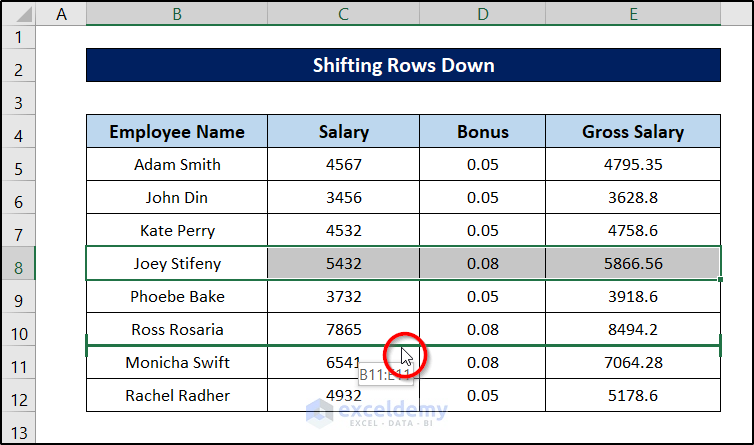
- Now release the mouse.
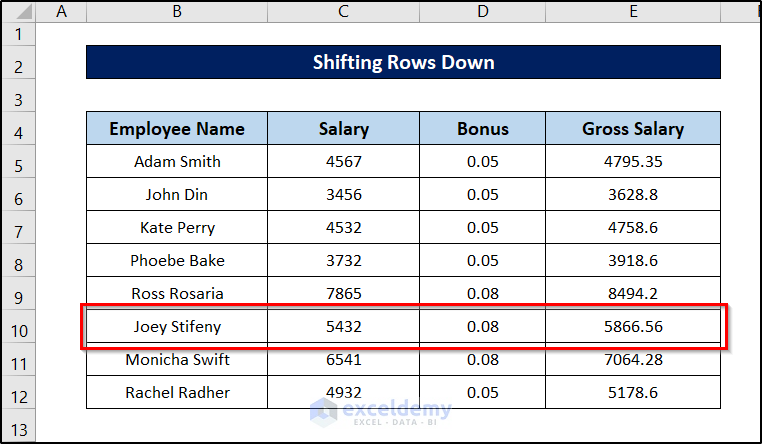
This will shift any number of selected rows down in Excel without creating new rows or changing the order of the other values in the dataset.
Download Practice Workbook
You can download the workbook used for the demonstration with all the examples from the link below.
Conclusion
It’s crucial to shift cells down in an efficient way. Now you have these ways, you’ll have no trouble shifting cells down. Thank you for reading this article and stay tuned for our next post. If you have any queries or opinions, please share them in the comments section below.
Related Articles
- Fix: Excel Cannot Shift Nonblank Cells
- How to Tab to Certain Cells in Excel
- How to Perform Double Click Cell Jump in Excel
- How to Move Down One Cell Using Excel VBA
- Move One Cell to Right Using VBA in Excel
<< Go Back to Move Cells | Excel Cells | Learn Excel
Get FREE Advanced Excel Exercises with Solutions!

Alt+enter worked for me, but then a few hours later it doesn’t. When I press alt+enter it either opens a new book or closes the current one. Then I restarted my laptop and now it doesn’t do anything