In this instructive session, I’ll show you 3 handy methods on how to create rows within a cell in Excel.
Watch Video – Create Rows within a Cell in Excel
How to Create Rows within a Cell in Excel: 3 Methods
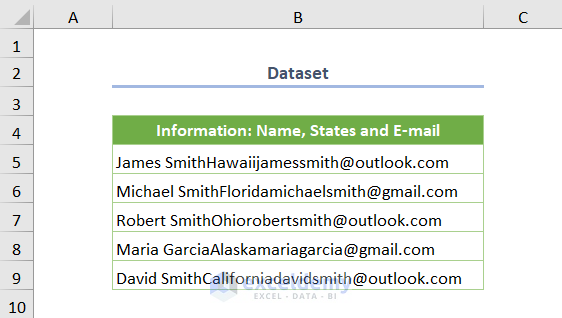
Let’s introduce today’s dataset where the Name of some employees is provided along with their corresponding States and E-mail (these are located sequentially). Now, you need to create multiple rows to keep the given information within a cell.
Let’s explore the methods.
1. Using Wrap Text Feature
In the beginning method, you’ll see the application of the Wrap Text feature in Excel. Please do the following steps.
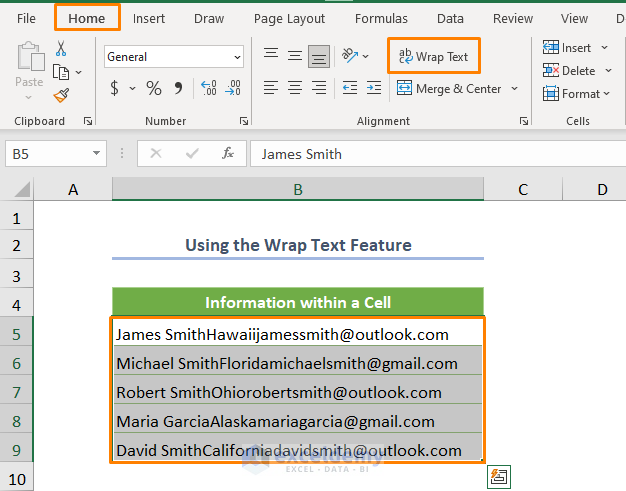
Step 01: Apply the Wrap Text Feature
➜ First, select the entire dataset (e.g. B5:B9 cells)
➜ Later, choose the Wrap Text feature from the Alignment ribbon (in the Home tab).
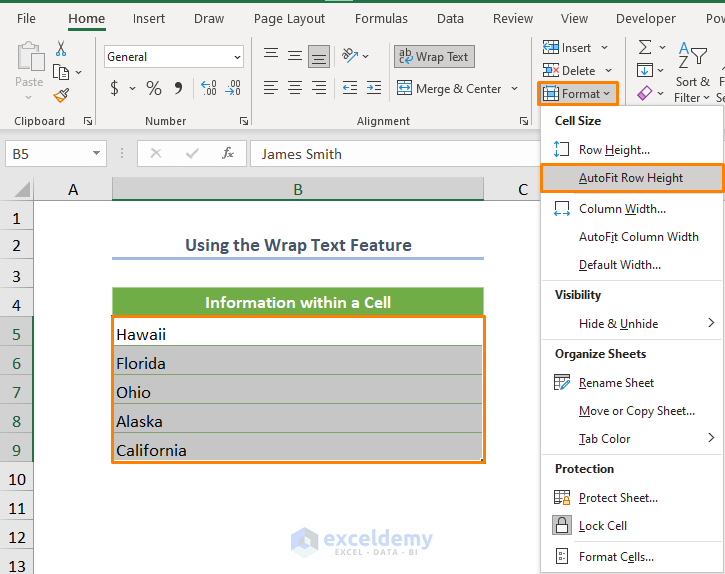
Step 02: Turn on AutoFit Row Height
In this step, you need to turn on the AutoFit Row Height option.
➜ Just click on the drop-down list of the Format feature and choose the AutoFit Row Height option while selecting the cells.
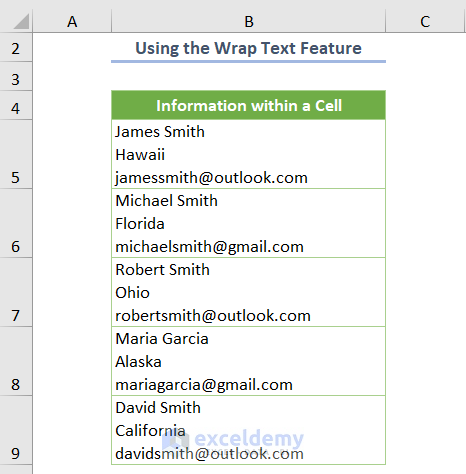
Eventually, you’ll get the following output where the Name, State, and E-mail address are located separately (multiple lines) within the single B5 cell.
Read More: How to Resize All Rows in Excel
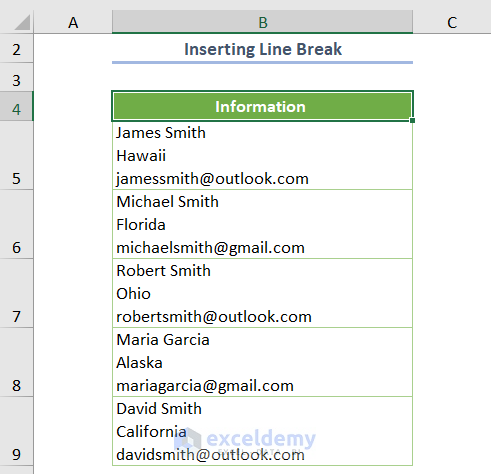
2. Inserting Line Break
Another way to create multiple lines within a cell is to insert a line break after each piece of information.
➜ So, go to after the Name (e.g. James Smith) in the B5 cell and press ALT + ENTER to add a line break in the cell.
➜ Then, repeat the process in the rest cells after each information except the last information. You don’t need to have a line break after the E-mail.

After using the AutoFitRow Height option, you’ll get the following output.
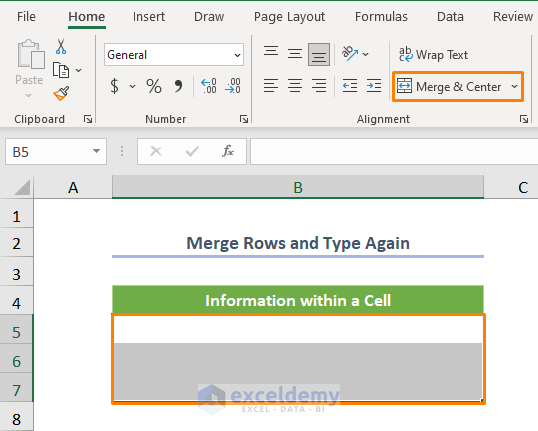
3. Merging Rows to Create Multiple Rows within a Cell
Most likely, this method is the desired one that you’re looking for! Certainly, you can create rows to keep information within a cell using this simple but effective method. For example, you can store the information available in the B5 cell in Row 5-7.
➜ To do this, you need to select the B5:B7 cells and pick the Merge & Center option from the Home tab.
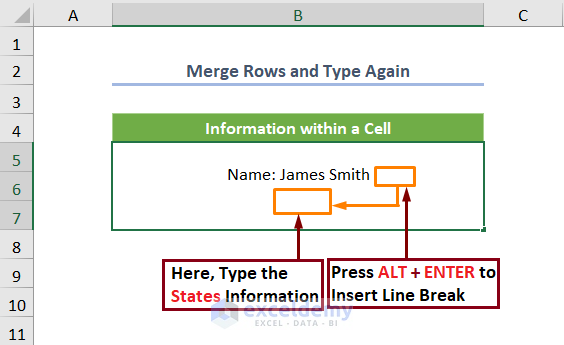
➜ Subsequently, type or copy-paste (CTRL + C to copy and CTRL + V to paste) Name and then press ALT + ENTER to insert a line break.
➜ Later, type another information (e.g. States) in the newly created line.
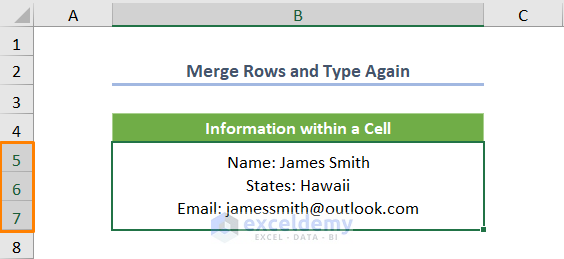
After adding an E-mail, you’ll get the following output.
Conclusion
That’s the end of today’s session. I strongly believe from now you can easily create rows within a cell in Excel. Anyway, if you have any queries or recommendations, please share them in the comments section.
Related Articles
- How to Color Alternate Rows in Excel
- How to Create Collapsible Rows in Excel
- How to Expand or Collapse Rows with Plus Sign in Excel
- How to Copy Every Nth Row in Excel
- How to Lock Rows in Excel
- How to Expand and Collapse Rows in Excel
- How to Number Rows in Excel
<< Go Back to Rows in Excel | Learn Excel
Get FREE Advanced Excel Exercises with Solutions!
