Sometimes we need to write a large text of multiple lines in Excel. Text boxes are very useful when it is necessary to show a large text in Excel. Moreover, text boxes can be resized and moved around easily. In this article, we will show you how to insert text box in Excel in 5 easy ways.
How to Insert Text Box in Excel: 5 Easy Methods
In this article, we will demonstrate 5 easy ways to insert a text box in Excel. We will create a normal text box, ActiveX Text Box as well and VBA Text Box using easy steps in the following methods.
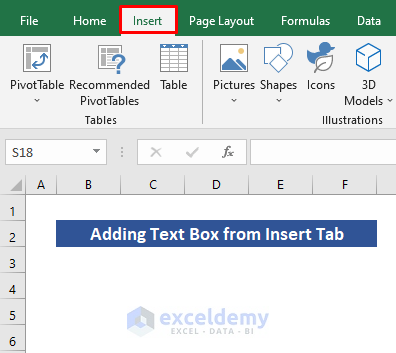
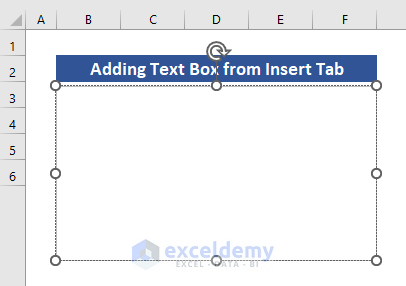
1. Add Text Box from Insert Tab
This is the most common method to insert a text box in Excel. The procedure is discussed below.
Steps:
- First, go to the Insert tab.
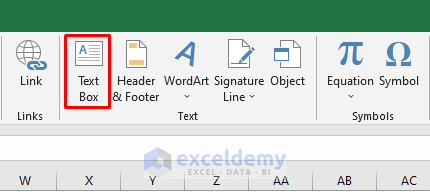
- Then, click on the Text Box from the ribbon.
- The cursor will look like a cross.
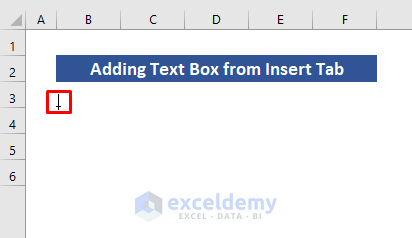
- Now, hold the left mouse button and drag it to create a text box of your desired size.
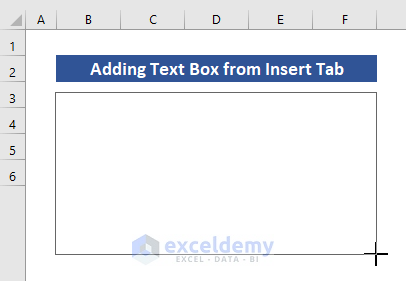
- Once you stop dragging, you will find the text box.
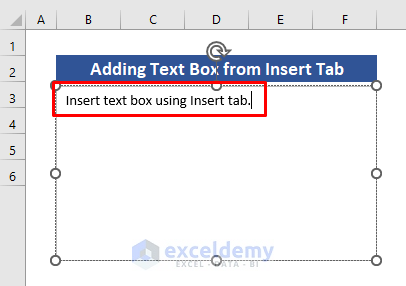
- Now, click inside the text box and type whatever you want.
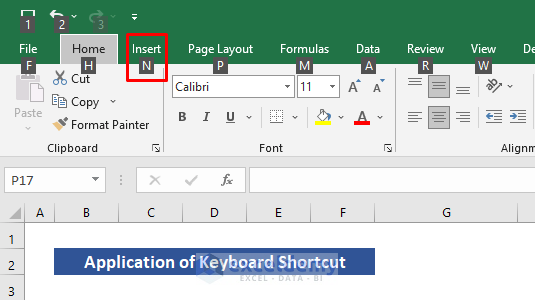
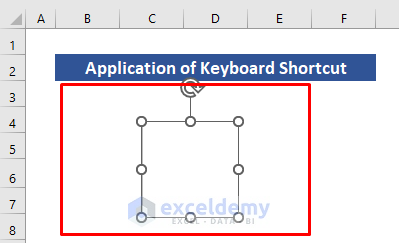
2. Apply Keyboard Shortcut
You can add a text box easily by using keyboard shortcuts. Follow these steps to learn the shortcut.
Steps:
- First, press the Alt button on your keyboard to show tab shortcuts.
- Next, you need to press the N button to open the Insert tab.
- Finally, press the X button to insert a text box.
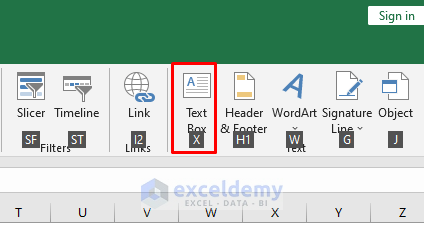
- After pressing the X button, you will see that the text box appears in the worksheet.
Read More: How to Get a Text Box Linked to Cell in Excel
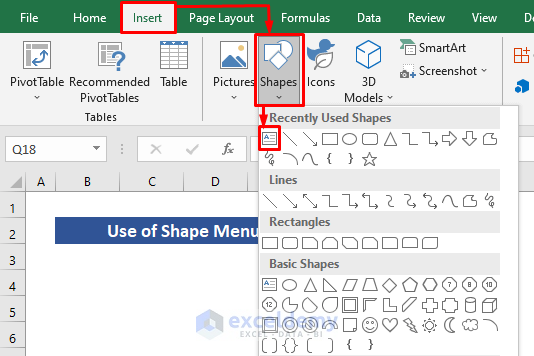
3. Use Shape Menu
In this method, we will use the Shapes menu to insert a text box in Excel. Read the following steps discussed below.
Steps:
- To begin with, click on the Insert tab and then go to Shapes.
- Then, select Text Box from the Basic Shapes option.
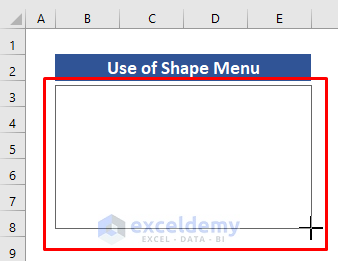
- Next, drag your cursor to create a text box of your desired size.
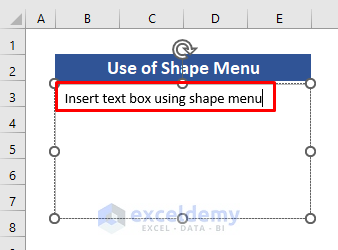
- Now, you can write anything in the text box you need.
Read More: How to Link Textbox to Multiple Cells in Excel
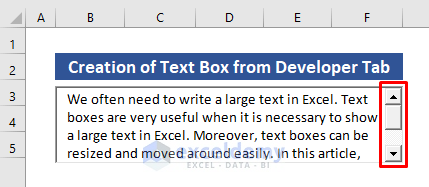
4. Create ActiveX Text Box from the Developer Tab
We will now use the Developer tab to create an ActiveX Text Box. This type of text box is very flexible to use. You can add a scrollbar in this type of text box too. Follow these steps to learn how to do it.
Steps:
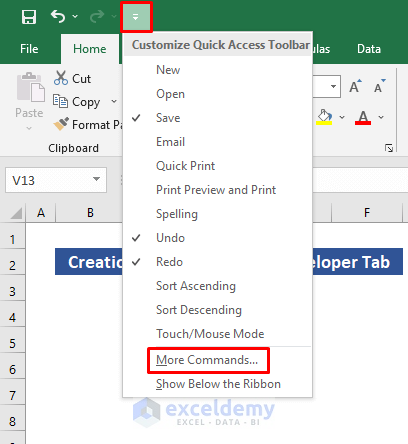
- First, we need to enable the Developer tab. To do that, click on the Customize Quick Access Toolbar drop-down arrow from above the Insert
- Next, select More Commands to go to Excel Options.
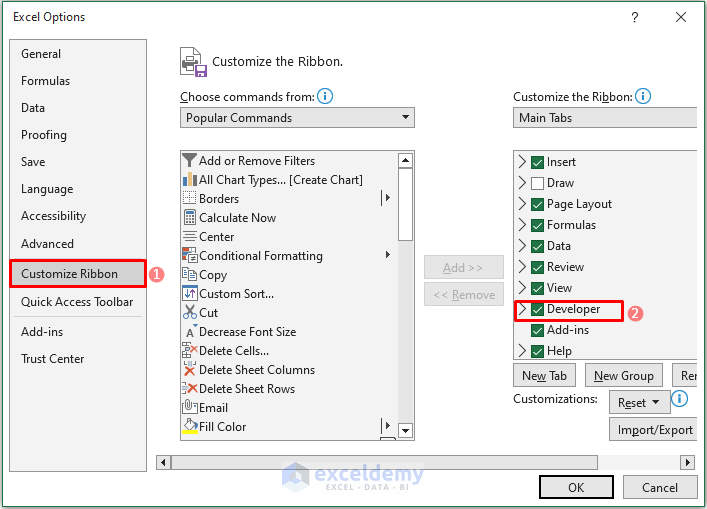
- Excel Options window will appear. Go to Customize Ribbon from there.
- Then, check the Developer option box.
- Press Enter and the Developer tab is enabled now.
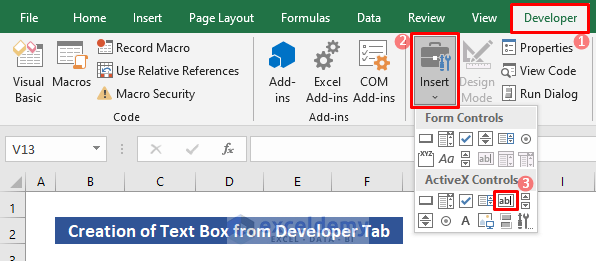
- You will find the Developer tab above the ribbon. Click on it.
- Next, click on Insert from the ribbon and select the Text box.
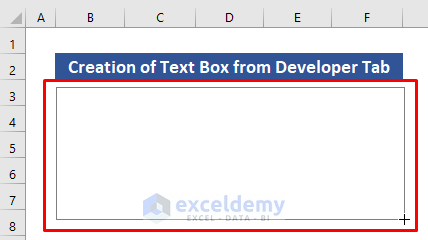
- Now, drag your cursor to create a text box.
- This type of text box has the Design Mode enabled by default. We need to switch off this mode and enable the Type Mode.
- To do it, once the text box is created, right-click on it.
- Then, select TextBox Object and click on Edit.
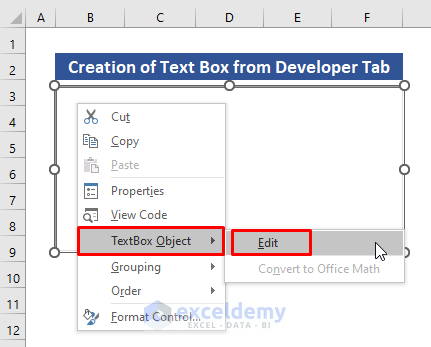
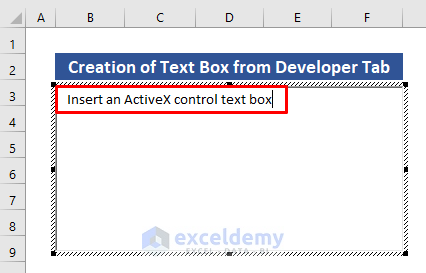
- You will find that the Type Mode is enabled now, and you can type your desired text in there.
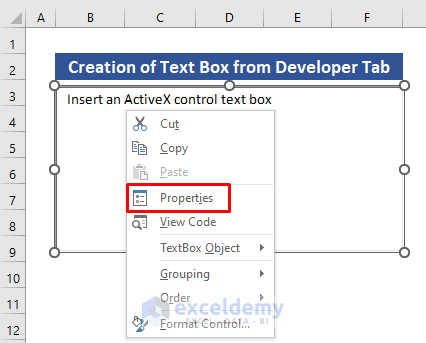
- Now, we want to add a scrollbar in our text box.
- For this purpose, right-click on the text box and select Properties.
- Change the Multiline option from False to True. It will allow multiline text in the text box.
- Then, change the ScrollBars option to 2-fmScrollBarsVertical to add a vertical scrollbar.
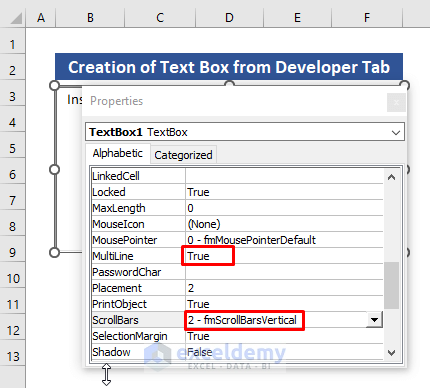
- Now, if you look at your text box, you will find a scrollbar on the right side.
Read More: How to Edit Text Box in Excel
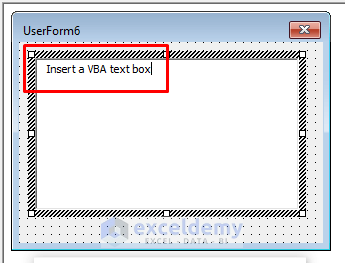
5. Insert VBA Text Box
Now you will see how to insert a VBA Text Box in Excel. Keep on reading to learn the steps.
Steps:
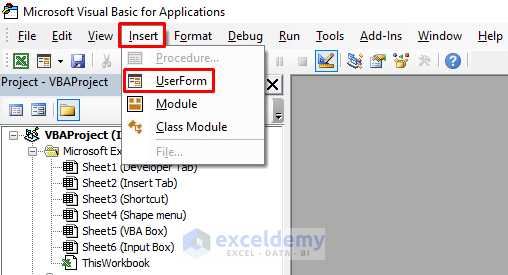
- In the beginning, press Alt+F11 to open the Microsoft Visual Basic window.
- Next, click on Insert and select UserForm.
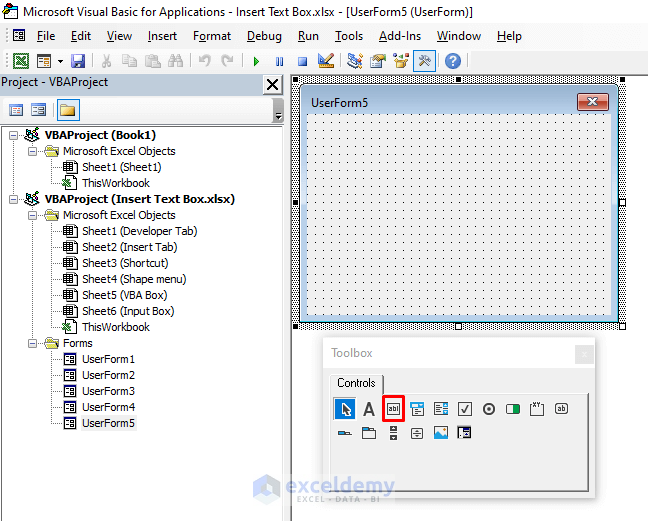
- A UserForm window will appear with a Toolbox.
- Now, click the Text Box option in the Toolbox.
- Then, go to the UserForm and drag your cursor to insert a text box.
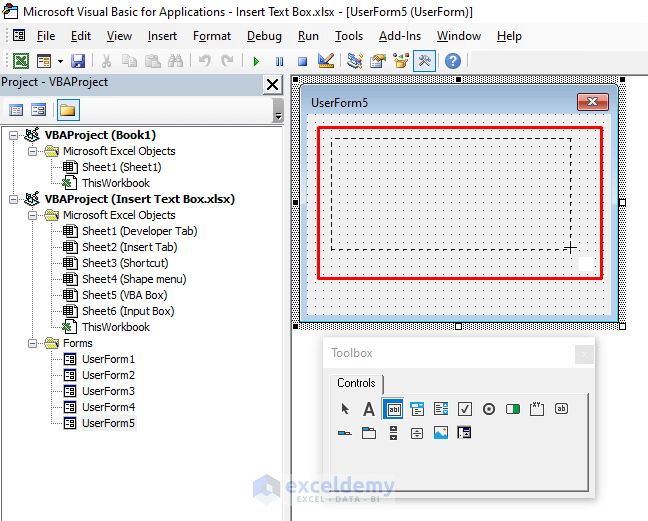
- Once you stop dragging, a text box will be created, and you will be able to type any text in the text box.
How to Create Input Box in Excel
We will now create an Input Box in Excel. We will run a VBA code for this purpose. Follow these steps to create and run a VBA code to create an input box.
Steps:
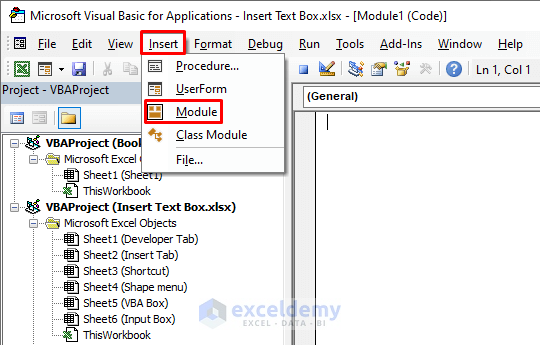
- First, go to the Microsoft Visual Basic window by pressing Alt+F11.
- Next, in the Microsoft Visual Basic window, select Module in the Insert tab.
- Now, we will write a VBA code in the module.
- In the code, we will use the InputBox You can type your preferred Prompt, Title, or Default inside it.

- Then, you can add your preferred location where you want the text. For this purpose, we used the Range
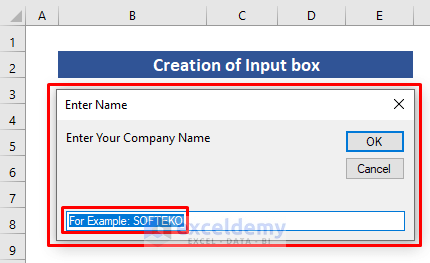
- For instance, we chose the B5 cell as the location, “Enter Your Company Name” as the Prompt.
- Additionally, we wrote “Enter Name” as the Title and “For Example: SOFTEKO” as Default The VBA code is given below.
Sub Create_Input_Box()
 Range(B5) = InputBox("Enter Your Company Name", "Enter Name", "For Example: SOFTEKO")
End Sub
- Finally, press F5 to run the code and go back to your worksheet.
- You will find an input box there. Write what you want in the input box and press OK.
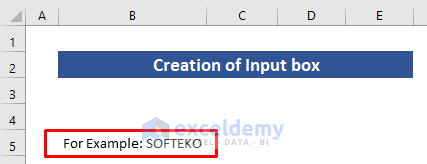
- The text will appear in cell B5.
Things to Remember
- After creating an ActiveX Text Box, you need to disable the Design Mode first to write any text in the box.
- If you already have the Developer tab in your worksheet, you don’t need to enable it.
Download Practice Workbook
Download this practice workbook for practice while you are reading this article.
Conclusion
Thanks for making it this far. I hope you find this article useful. Now you know 5 easy ways to insert a text box in Excel. Please let us know if you have any further queries, and feel free to give us any recommendations in the comment section below.
Related Articles
- Formatting Text Box in Excel: All Properties to Explore
- How to Align Text Boxes in Excel
- How to Delete Text Box in Excel
- [Solved] Excel Text Box Not Showing
<< Go Back to TextBox | Learn Excel
Get FREE Advanced Excel Exercises with Solutions!
