Excel users frequently try to adjust the alignment to improve data representation. As a result, in this article, altering alignment to the right will be utilized to demonstrate changing alignment. This post shows you five different ways to align right in Excel.
Types of Alignment in Excel
The main types of alignment in Excel are:
- Vertical Alignment: top, middle & bottom alignment
- Horizontal Alignment: right, center & left alignment

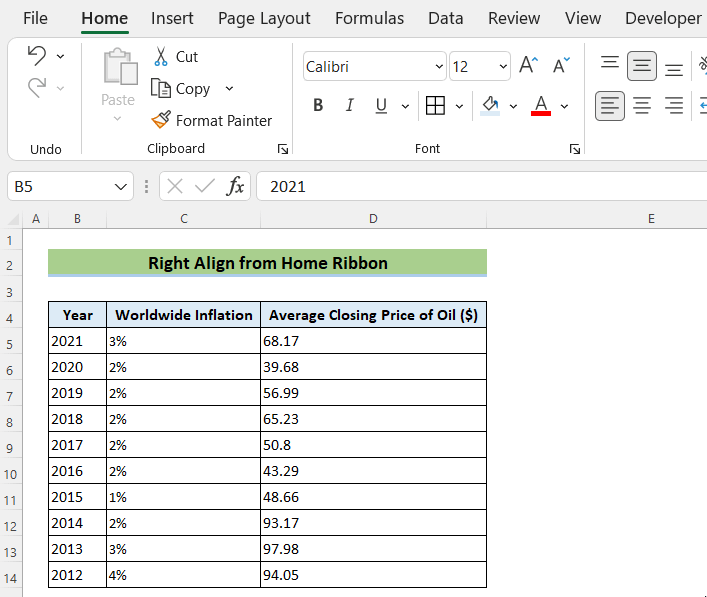
1. Using Home Ribbon to Align Right in Excel
Now let us begin with the most common way, which is to use Excel’s Ribbon tool to right-align the contents of a cell. So simply follow along.
To do so the steps are: Select data >> Home >> Alignment >> Align Right.
2. Aligning Data to Right with Format Cells Wizard
To right-align text, we’ll utilize the Format Cells dialog box in our first technique. Simply follow these few instructions.
📌 Steps:
- Firstly, select the data range B5:D14, and right-click on your mouse. Choose Format Cells from the list of options.
- Or, you can press Ctrl+1. After that, the Format Cells dialog box will appear in Excel.
- Now, go through the following steps: the Alignment tab >> in the Horizontal field, click the drop-down >> choose the Right (Indent) option >> press OK.

Read More: How to Change Alignment in Excel
3. Applying Custom Number Format to Align Text to the Right
To right-align text, we’ll utilize the Custom in Format Cells dialog box in this technique. Simply follow these few instructions.
📌 Steps:
- Firstly, select the data range B5:B14, and press Ctrl+1.
- Now, the Format Cells dialog box will appear in Excel.
- Go through the following steps: the Number tab >> Custom >> Type:
* @>> Press OK.
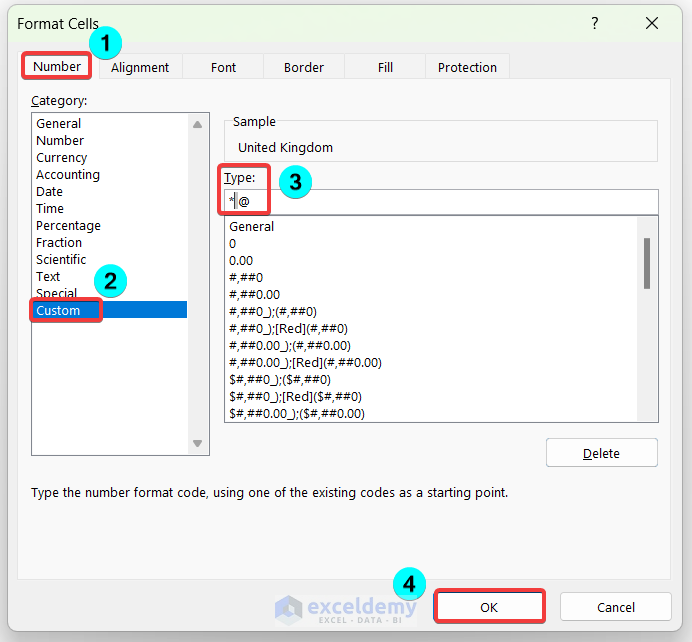
- In the end, the right-aligned country column will appear.
4. Using Keyboard Shortcut to Align Text to the Right in Excel
Whether you’re looking for keyboard shortcuts to right-align text, Excel has an excellent way. Allow me to walk you through the process below.
📌 Steps:
- First, press ALT+H then like the following image select data.
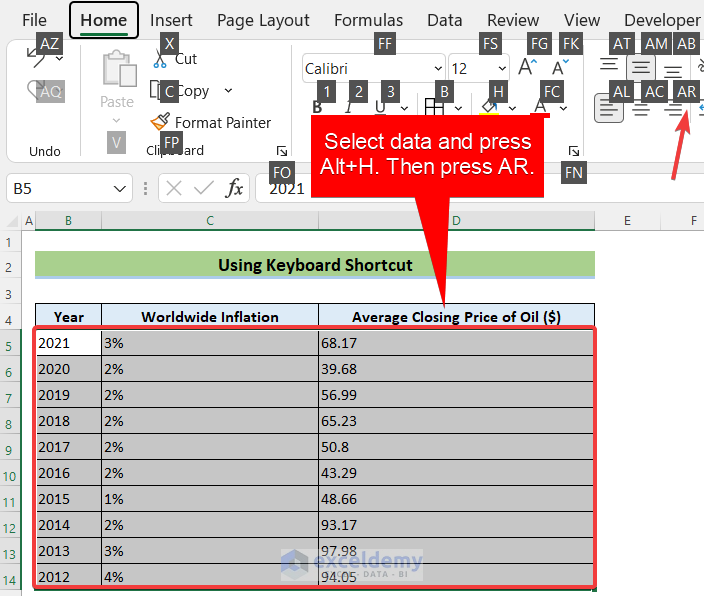
- Pressing AR will align data on the right side of the table.
Read More: How to Center Text in a Cell in Excel
5. Applying Excel VBA to Align Text to the Right
Sometimes Excel users could consider automating the same monotonous and repetitive tasks in Excel. No need to worry, since VBA has you covered. In fact, you may completely automate the preceding approaches using VBA code. It’s simple and straightforward; just follow along.
📌 Steps:
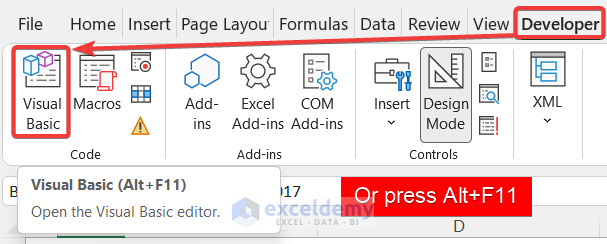
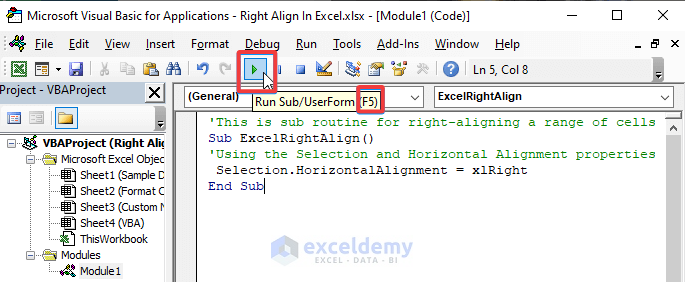
- In the first step, select the D5:D14 cells >> navigate to the Developer tab >> click the Visual Basic button or alternatively just press Alt+F11.
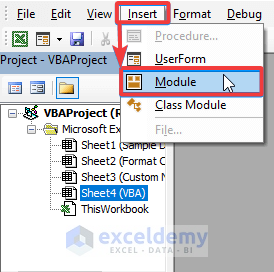
- Then, navigate to the Insert tab >> Module.
- You may copy the code from here and paste it into the window. The VBA code is shown below for convenience:
'This is sub routine for right-aligning a range of cells
Sub ExcelRightAlign()
'Using the Selection and Horizontal Alignment properties
 Selection.HorizontalAlignment = xlRight
End Sub
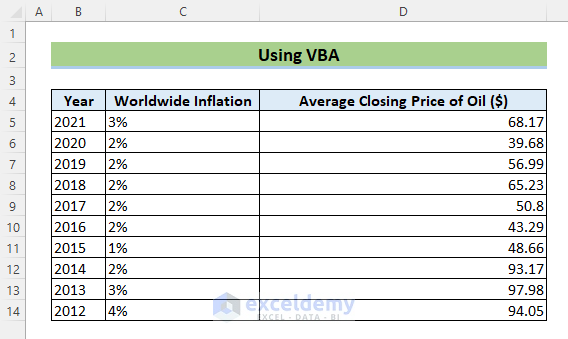
- As a result of the preceding processes, the final data of D5:D14 will look like this.
- However, we have other columns where data is not right aligned. To accomplish this, we have selected the remaining left-aligned cells of B5:C14.
- Now, on the Developer tab, select the Macros button.
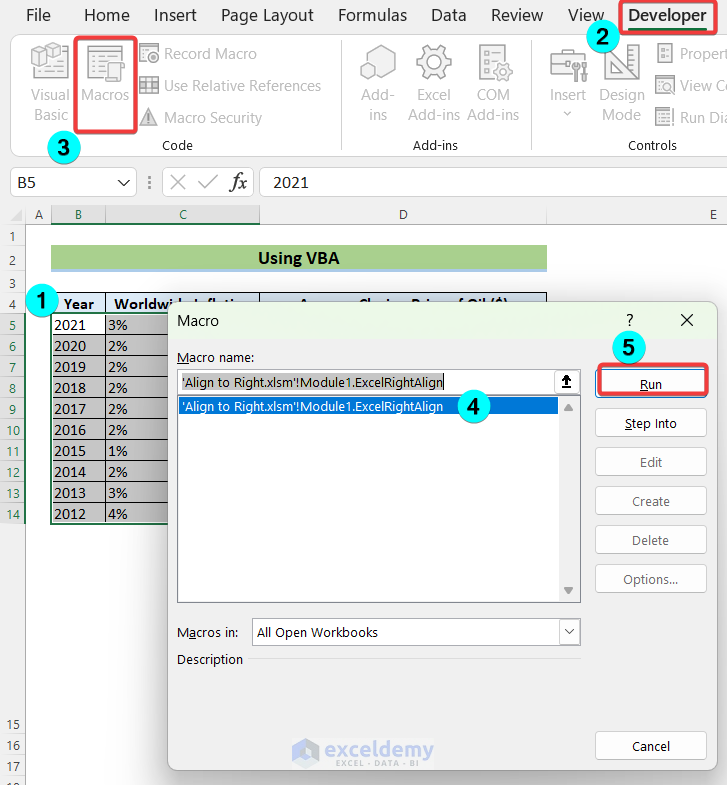
- The Macro wizard appears when you complete this step. To run the Macro, click the Run button.
Read More: How to Align Text in Excel
Download Practice Workbook
You can download the practice workbook from the following download button.
Conclusion
Follow these steps and stages to right align in Excel. You are welcome to download the workbook and use it for your own practice. If you have any questions, concerns, or suggestions, please leave them in the comments section below or on our forum.
Related Articles
- All Types of Alignment in Excel
- How to Apply Center Horizontal Alignment in Excel
- [Fixed!] Excel Cell Alignment Not Working
- How to Top Align in Excel
- How to Middle Align in Excel
- Align Two Sets of Data in Excel
- How to Bottom Align in Excel
- How to Left Align in Excel
<< Go Back to Alignment in Excel | Excel Cell Format | Learn Excel
Get FREE Advanced Excel Exercises with Solutions!
