Solver is a Microsoft Excel add-in program. The Solver is a part of the collection of What-If Analysis tools that we can use in Excel to test different situations. We can solve decision-making issues using the Excel tool Solver by finding the most perfect solutions. They also analyze how each possibility impacts the worksheet’s output.
Novices might find this topic a little complicated, but the step-by-step instructions provided in this article will help you understand how the Solver tool can be employed to make decisions. Let’s first examine how to make the Solver add-in available in Excel.
Where Is Solver in Excel: Find & Install
You can access Solver by choosing Data ➪ Analyze ➪ Solver. Sometimes it may happen that this command isn’t available, you have to install the Solver add-in using the following steps:
- First of all, choose the File tab.

- Secondly, select Options from the menu.

- Thus, the Excel Options appears which is actually a dialog box.
- Here, go to the Add-Ins tab.
- At the bottom of the Excel Options dialog box, there is the Manage drop-down list.
- From the list, select Excel Add-Ins and then click Go.

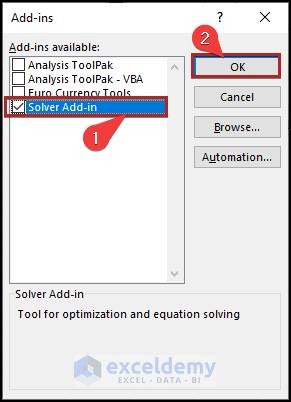
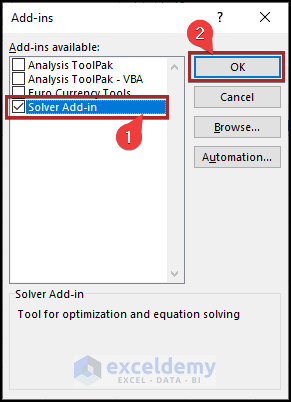
- Immediately, the Add-ins dialog box appears.
- Then, place a checkmark next to Solver Add-In, and then click OK.
Another way: Also, we can also install the Solver add-in using the Developer tab. Just follow along.
- Initially, proceed to the Developer tab.
- Secondarily, click on Excel Add-ins on the Add-ins group.
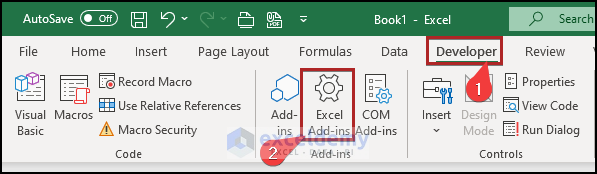
- Again, it opens the Add-ins wizard.
- After that, do the similar tasks that we’ve done above.
Once you activate the add-ins in your Excel workbook, they will be visible on the ribbon.
- Just move to the Data tab.
- And, you can find the Solver add-ins on the Analyze group.

Introduction to Solver Parameters
The Excel Solver determines the best solution to the formula stated in the objective cell.
First, let’s get introduced to the nomenclatures used in the Solver Parameters dialog box. While using the solver, that’ll be beneficial. These are the definitions for the terms:
- Objective Cell: It is simply a single cell with something like a formula in it. The constraint cells’ limitations are applied to the decision-based formula in the cell. The objective cell’s value can be decreased, increased, or fixed at the provided threshold.
- Variable Cells: Variable cells are made up of variable data that the Solver modifies to accomplish the goal.
- Constraint Cells: These are the constraints that the solution to the situation at hand must adhere to. On the other hand, these are the prerequisites that must be met.
How to Use Solver in Excel: 2 Examples
Let’s consider 2 different examples to understand the topic better. Here, we’ll show the usage of the Solver tool to figure out two different types of scenarios. So let’s explore them one by one.
Here, we have used Microsoft Excel 365 version, you may use any other version according to your convenience.
Example 01: Using Solver to Interpret Linear Programming in Excel
Let’s assume we have a decision model used in ABC Electronics. Here, each LED TV gives a Profit of $100, Costs $450, and Space Needed 0.6 units. The same parameters are given for AC and Refrigerator. The company has $60000 as Capital and 100 units of space available in hand.
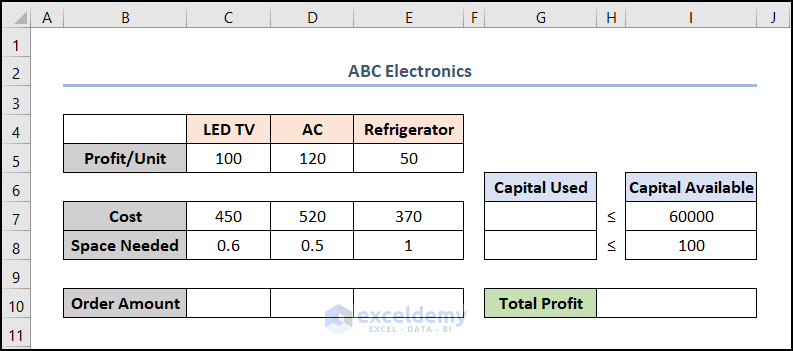
Now, we’ll determine the optimum Order Amounts for the above three products which will make the maximum Total Profit. Also, won’t cross the boundary of Capital Available. So, without further delay, let’s dive in!
📌 Steps:
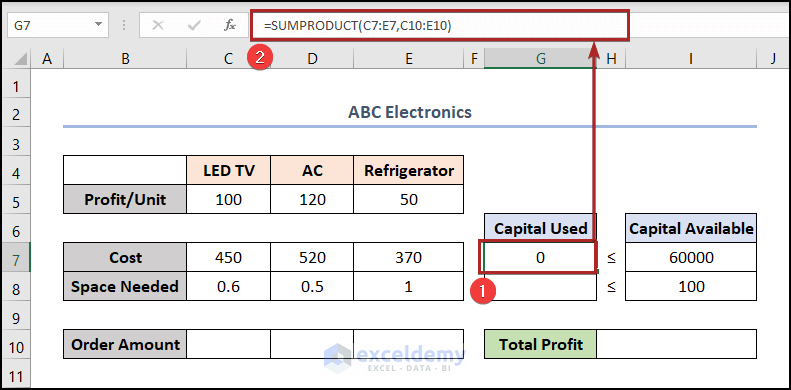
- At the very beginning, select cell G7 and write down the following formula.
=SUMPRODUCT(C7:E7,C10:E10)
Here, C7:E7 represents the Cost of the three products. And C10:E10 represents the Order Amount of the corresponding products. Hence, the SUMPRODUCT function takes these two arrays as an argument, multiplies the corresponding values of all the arrays, and then returns the sum of the products.
- Then, press ENTER.
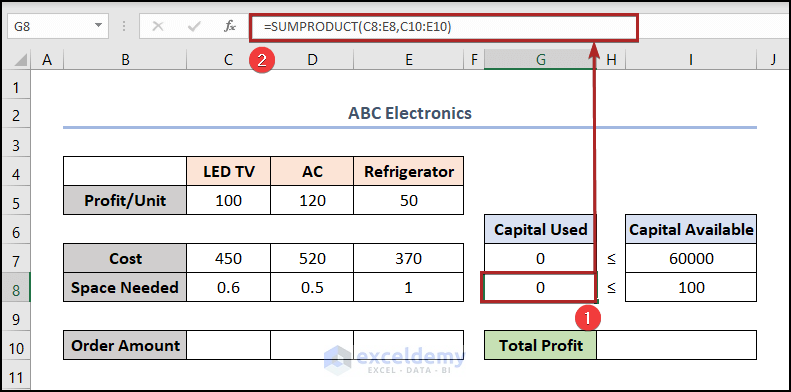
- Similarly, choose cell G8 and paste the formula below.
=SUMPRODUCT(C8:E8,C10:E10)
- After that, hit the ENTER key.
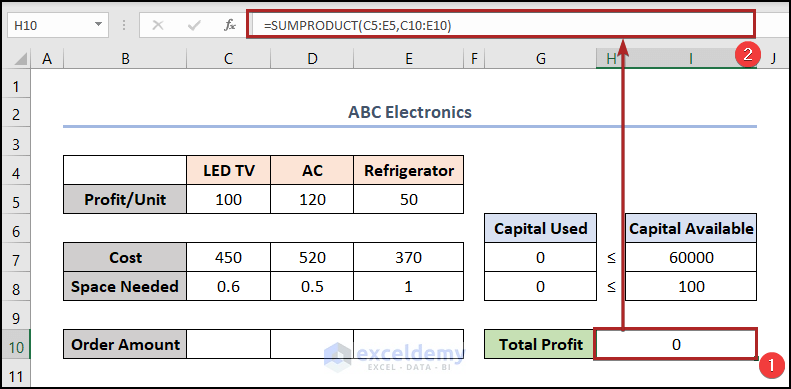
- Consequently, go to cell H10 and put the following formula into the cell.
=SUMPRODUCT(C5:E5,C10:E10)
Actually, it calculates the Total Profit by multiplying the Profit/Unit with the Order Amount.
- Later, tap ENTER.
- Now, we can check whether our formulas are working or not. To do this, we put some input in cells in the C10:E10 range. Thus, follow the image below to better understand the output.
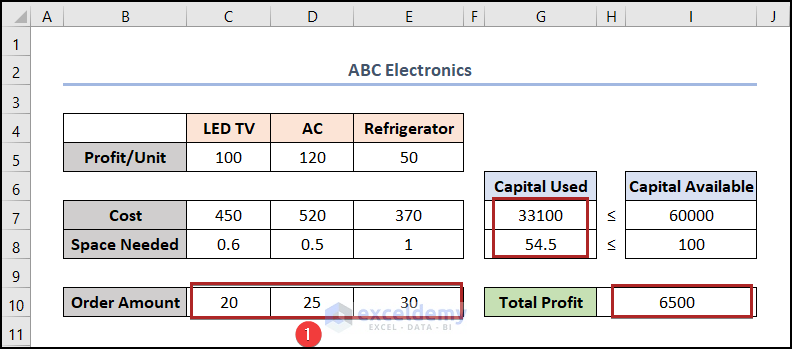
From the picture above, we can see that, we’ve got the Total Profit amount. But, this isn’t optimized. We need the maximum result in this field. For this, we’ll use the Solver tool. So, follow the steps below carefully.
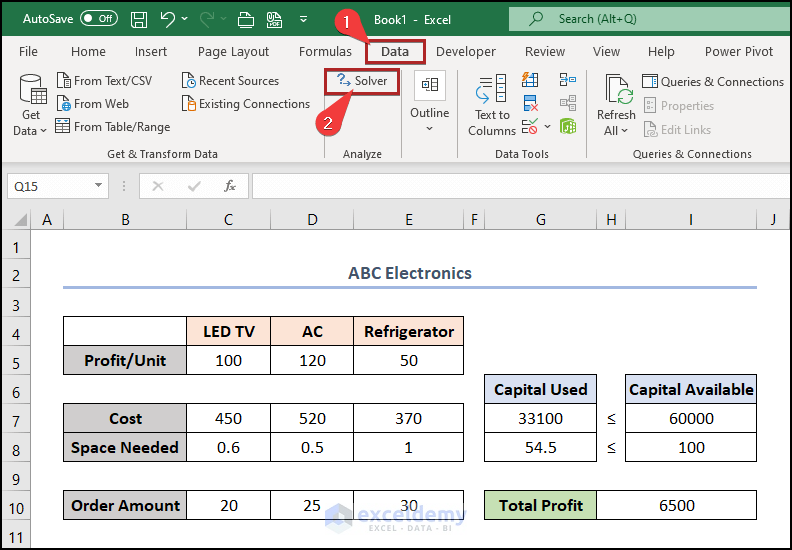
- First, jump to the Data tab.
- After that, select Solver add-in on the Analyze group.
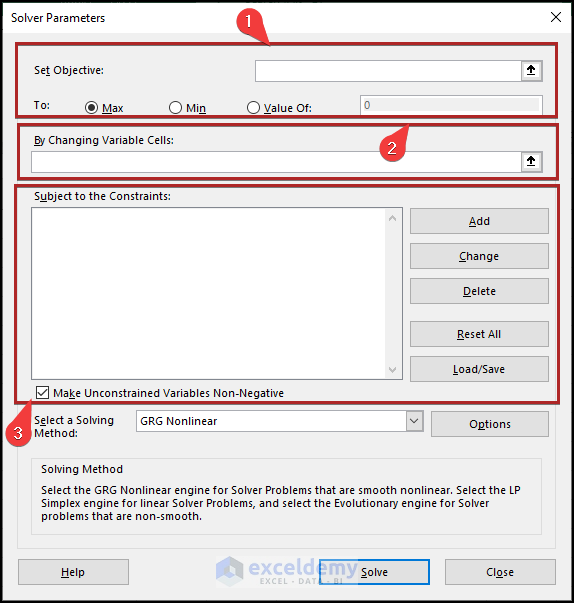
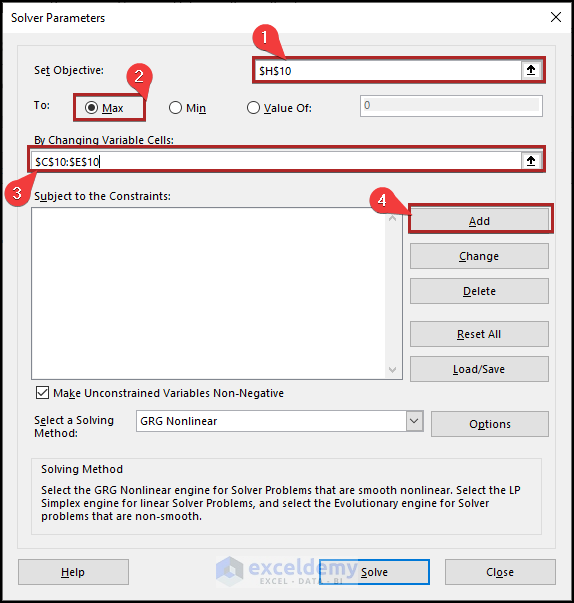
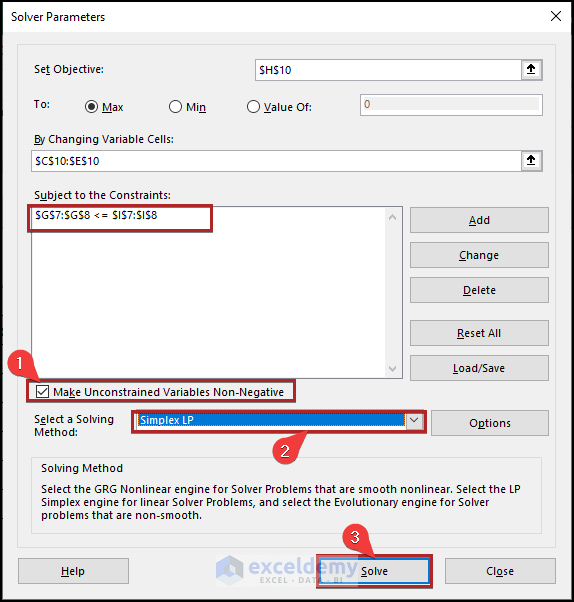
- Immediately, the Solver Parameters dialog box opens.
- First, give the cell reference of H10 in the Set Objective box.
- Secondly, select Max in the To section.
- Thirdly, put the cell reference of C10:E10 in the By Changing Variable Cells box.
- Subsequently, click on the Add button.
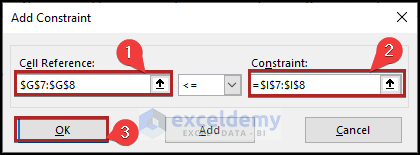
- Suddenly, it opens the Add Constraint input box.
- Here, give the cell reference of G7:G8 in the Cell Reference box.
- In the Constraint box, put the cell reference of I7:I8.
- Later, click OK.
- Again, it returns us to the Solver Parameters dialog box.
- Here, we can see the constraint in the Subject to the Constraints box that we’ve just added.
- After that, check the box of Make Unconstrained Variables Non-Negative.
- Finally, select Simplex LP from the Select a Solving Method drop-down list.
- Correspondingly, select the Solve button.
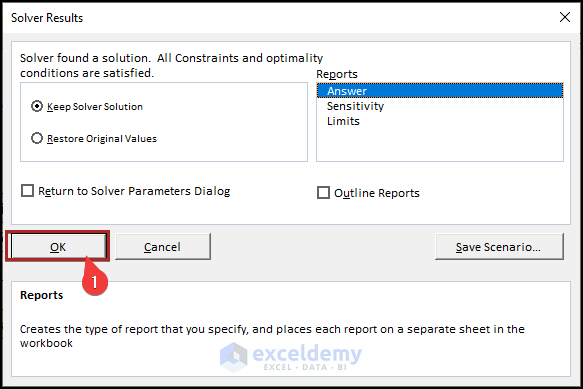
- Thus, the Solver Results wizard opens.
- Here, click OK.
- Hence, we can see that Excel found the optimum solution for our problem.
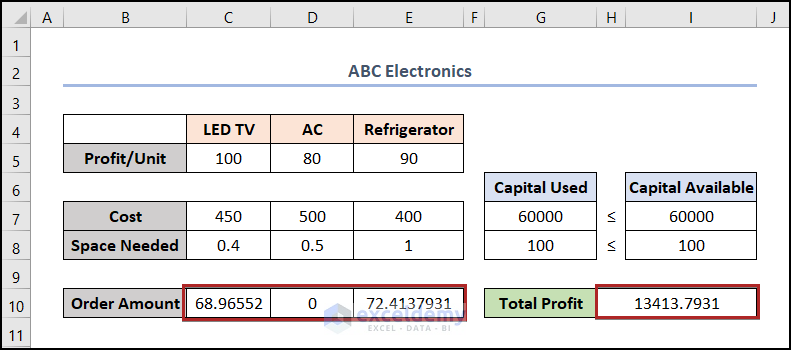
So, if the company add 68 nos LED TV and 72 nos Refrigerators to its inventory, it will make the maximum profit.
Read More: How to Use Excel Evolutionary Solver
Example 02: Utilizing Solver to Solve Algebraic Equations with Multiple Variables in Excel
Let’s say we have the following three equations.
2x + 5y + 2z = -38
3x – 2y + 4z = 17
-6x + y – 7z = -12
Now, we’ll solve the equations by using the Solver add-in. Thus, we’ll determine the value of the three variables x, y, and z.
Admittedly, I have skipped the process of solving the equation which you may explore if you wish.
Download Practice Workbook
You may download the following Excel workbook for better understanding and practice yourself.
Conclusion
I hope this article helps you understand what Solver in Excel is and how to use it perfectly. Don’t forget to download the Practice file. If you have any queries, please leave a comment below.
<< Go Back to Solver in Excel | Learn Excel
Get FREE Advanced Excel Exercises with Solutions!
